Adding photos to your Orca Scan sheets is a powerful way to document proof of delivery, conduct quality control, or showcase product variations. This guide will help you set up and use photo fields in Orca Scan, both on the web and mobile app.
How to Add A Photo Field
You can add a Photo Field in Orca Scan using either the mobile app or the web app. Follow the steps below for your preferred method:
How to Add a Photo Field via the Mobile App
- Scan a barcode or tap to edit an item in the list
- Tap the cog icon next to any of the fields
- Enter a name for your new field
- Set the data type to Photo
- Tap Save to add the field
After adding the field, refresh the mobile app. You can now scan a barcode (or tap an item) to add a photo.
How to Add a Photo Field via the Web App
- Right-click on a column and select Add Column
- Enter a name for your new column
- Set the data type to Photo
- Click Add to create the column
Your Photo Field is now ready for use.
How to Use a Photo Field
After adding a Photo Field, you can easily attach images from both the mobile app and web app:
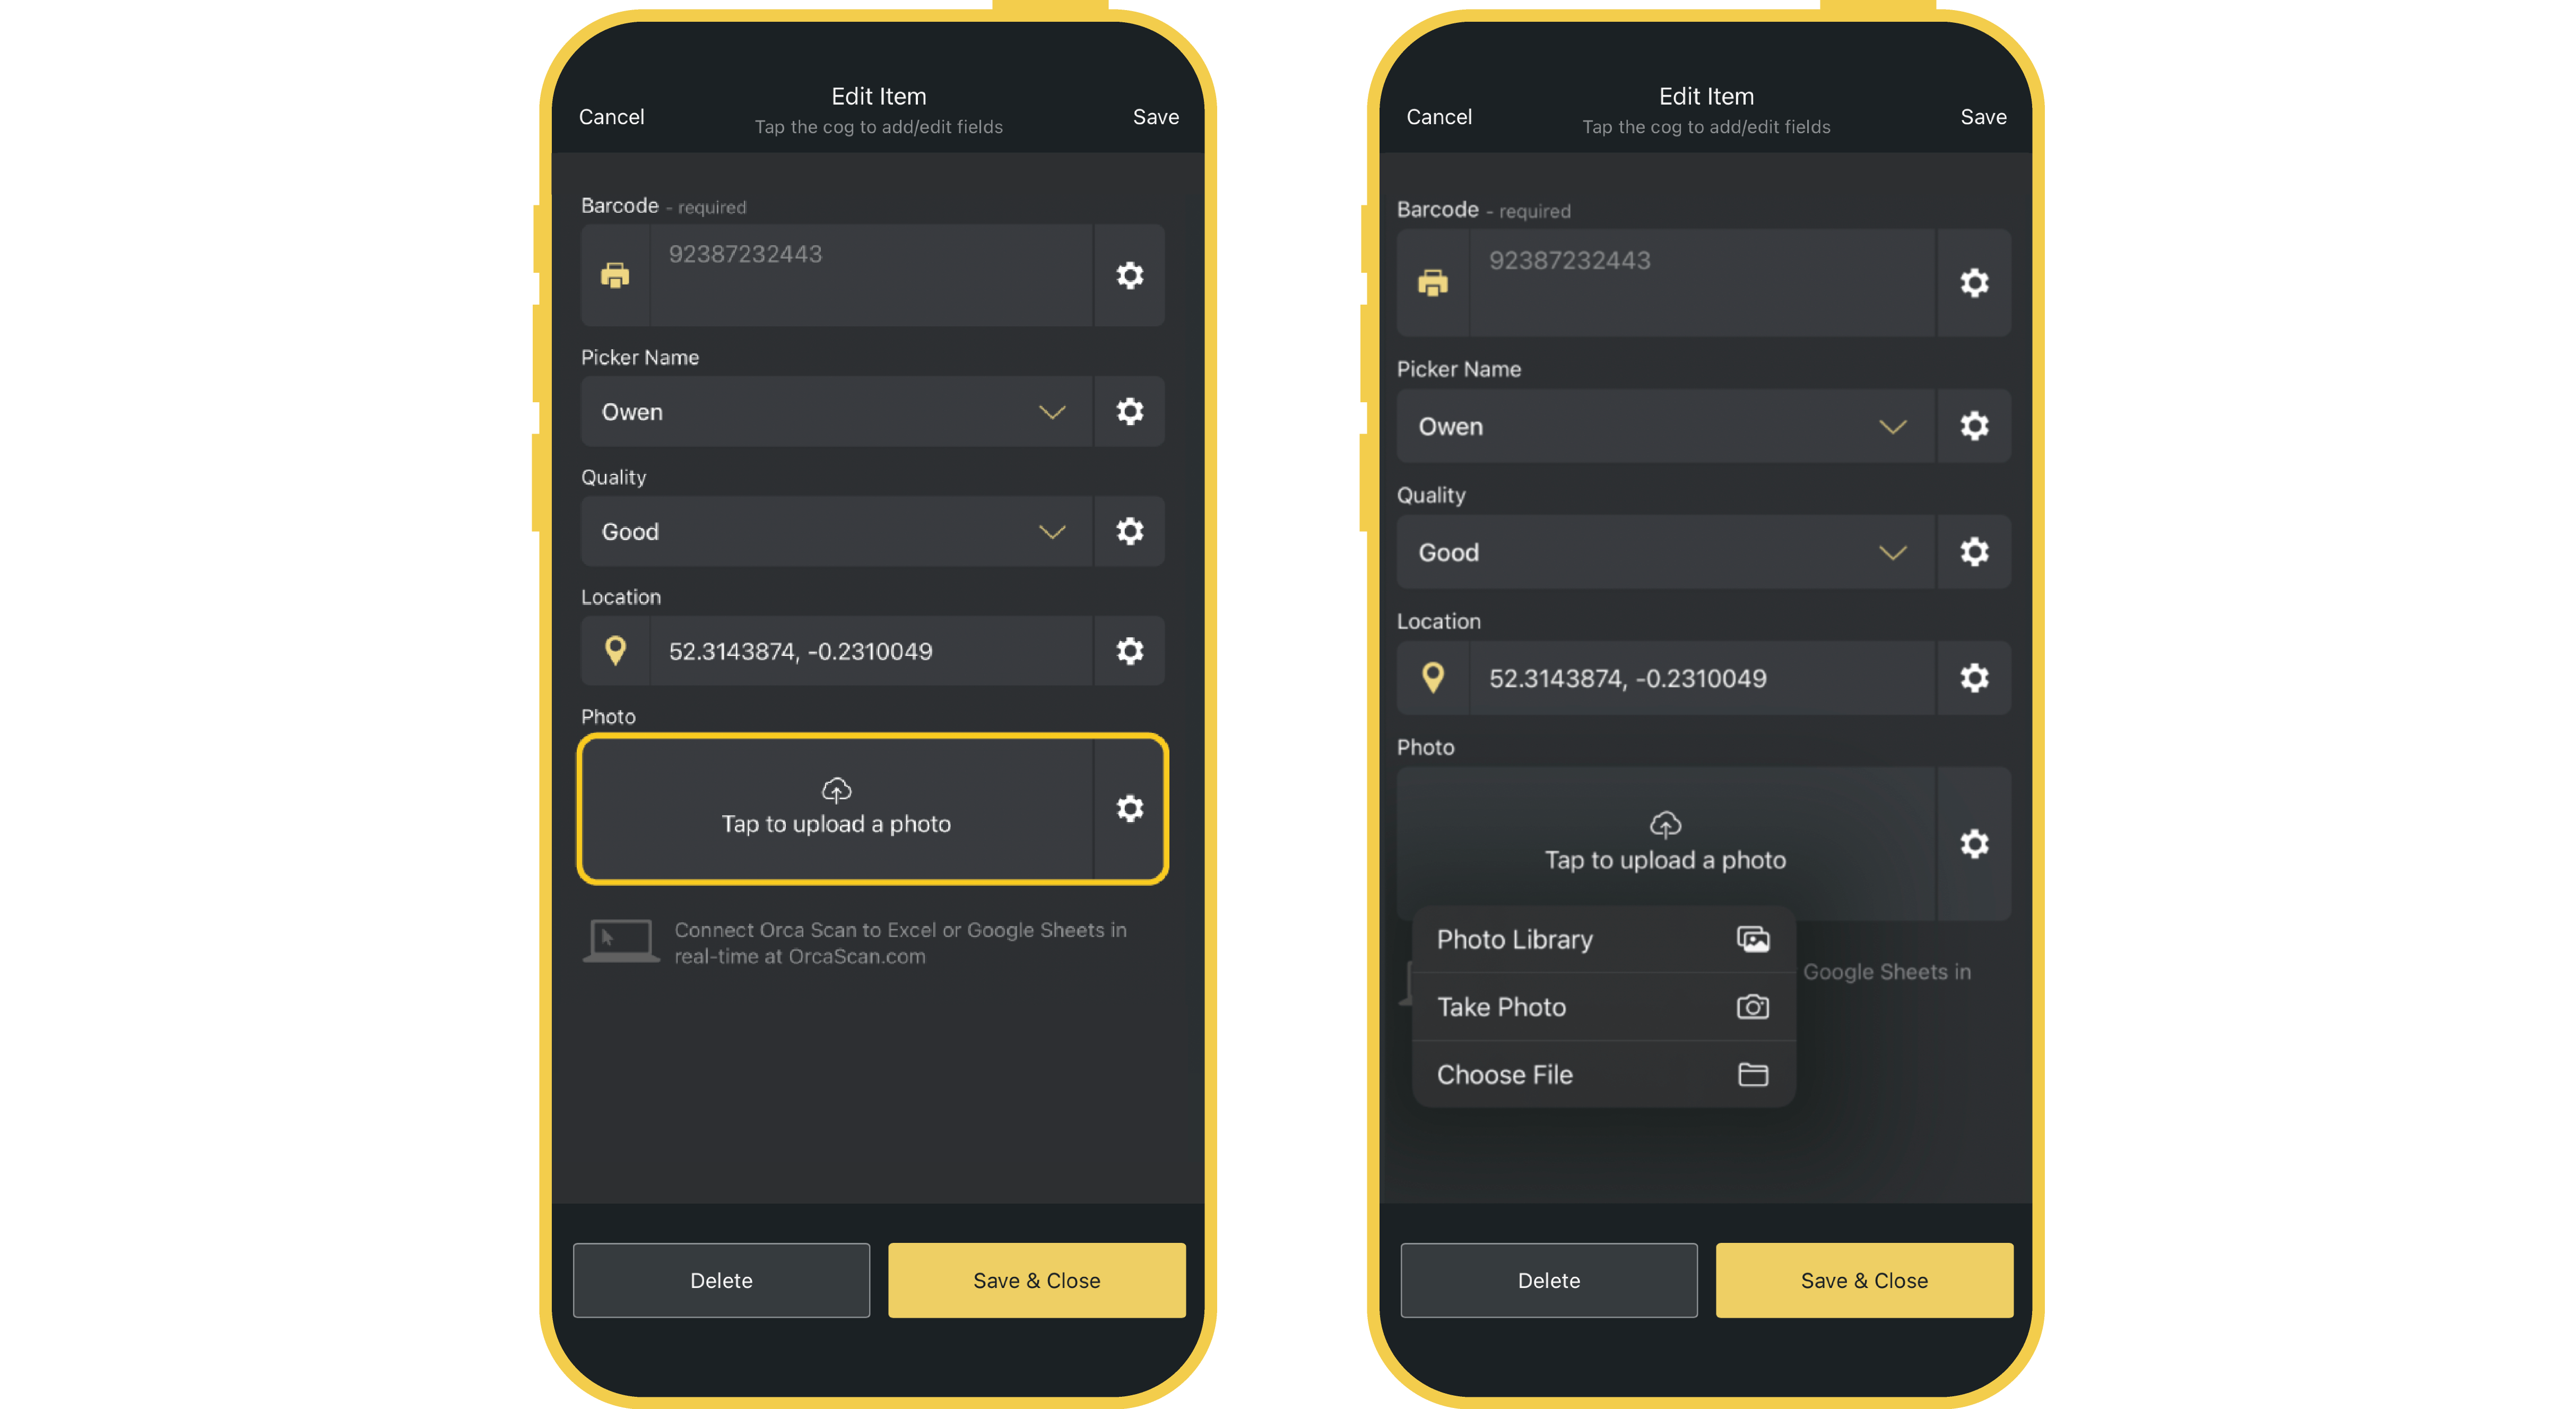
How to Use a Photo Field on Mobile
- Tap the Photo Field to attach an image
- Choose from your photo library or take a new photo
- Save and close the field
How to use a Photo Field on Web
- Click on the Photo Field in the desired row
- Select Tap to upload a photo
- Choose the image from your desktop
- Press Upload
- Save and exit
How to View Photos
Photos can be viewed from both the Orca Scan mobile app and the web app:
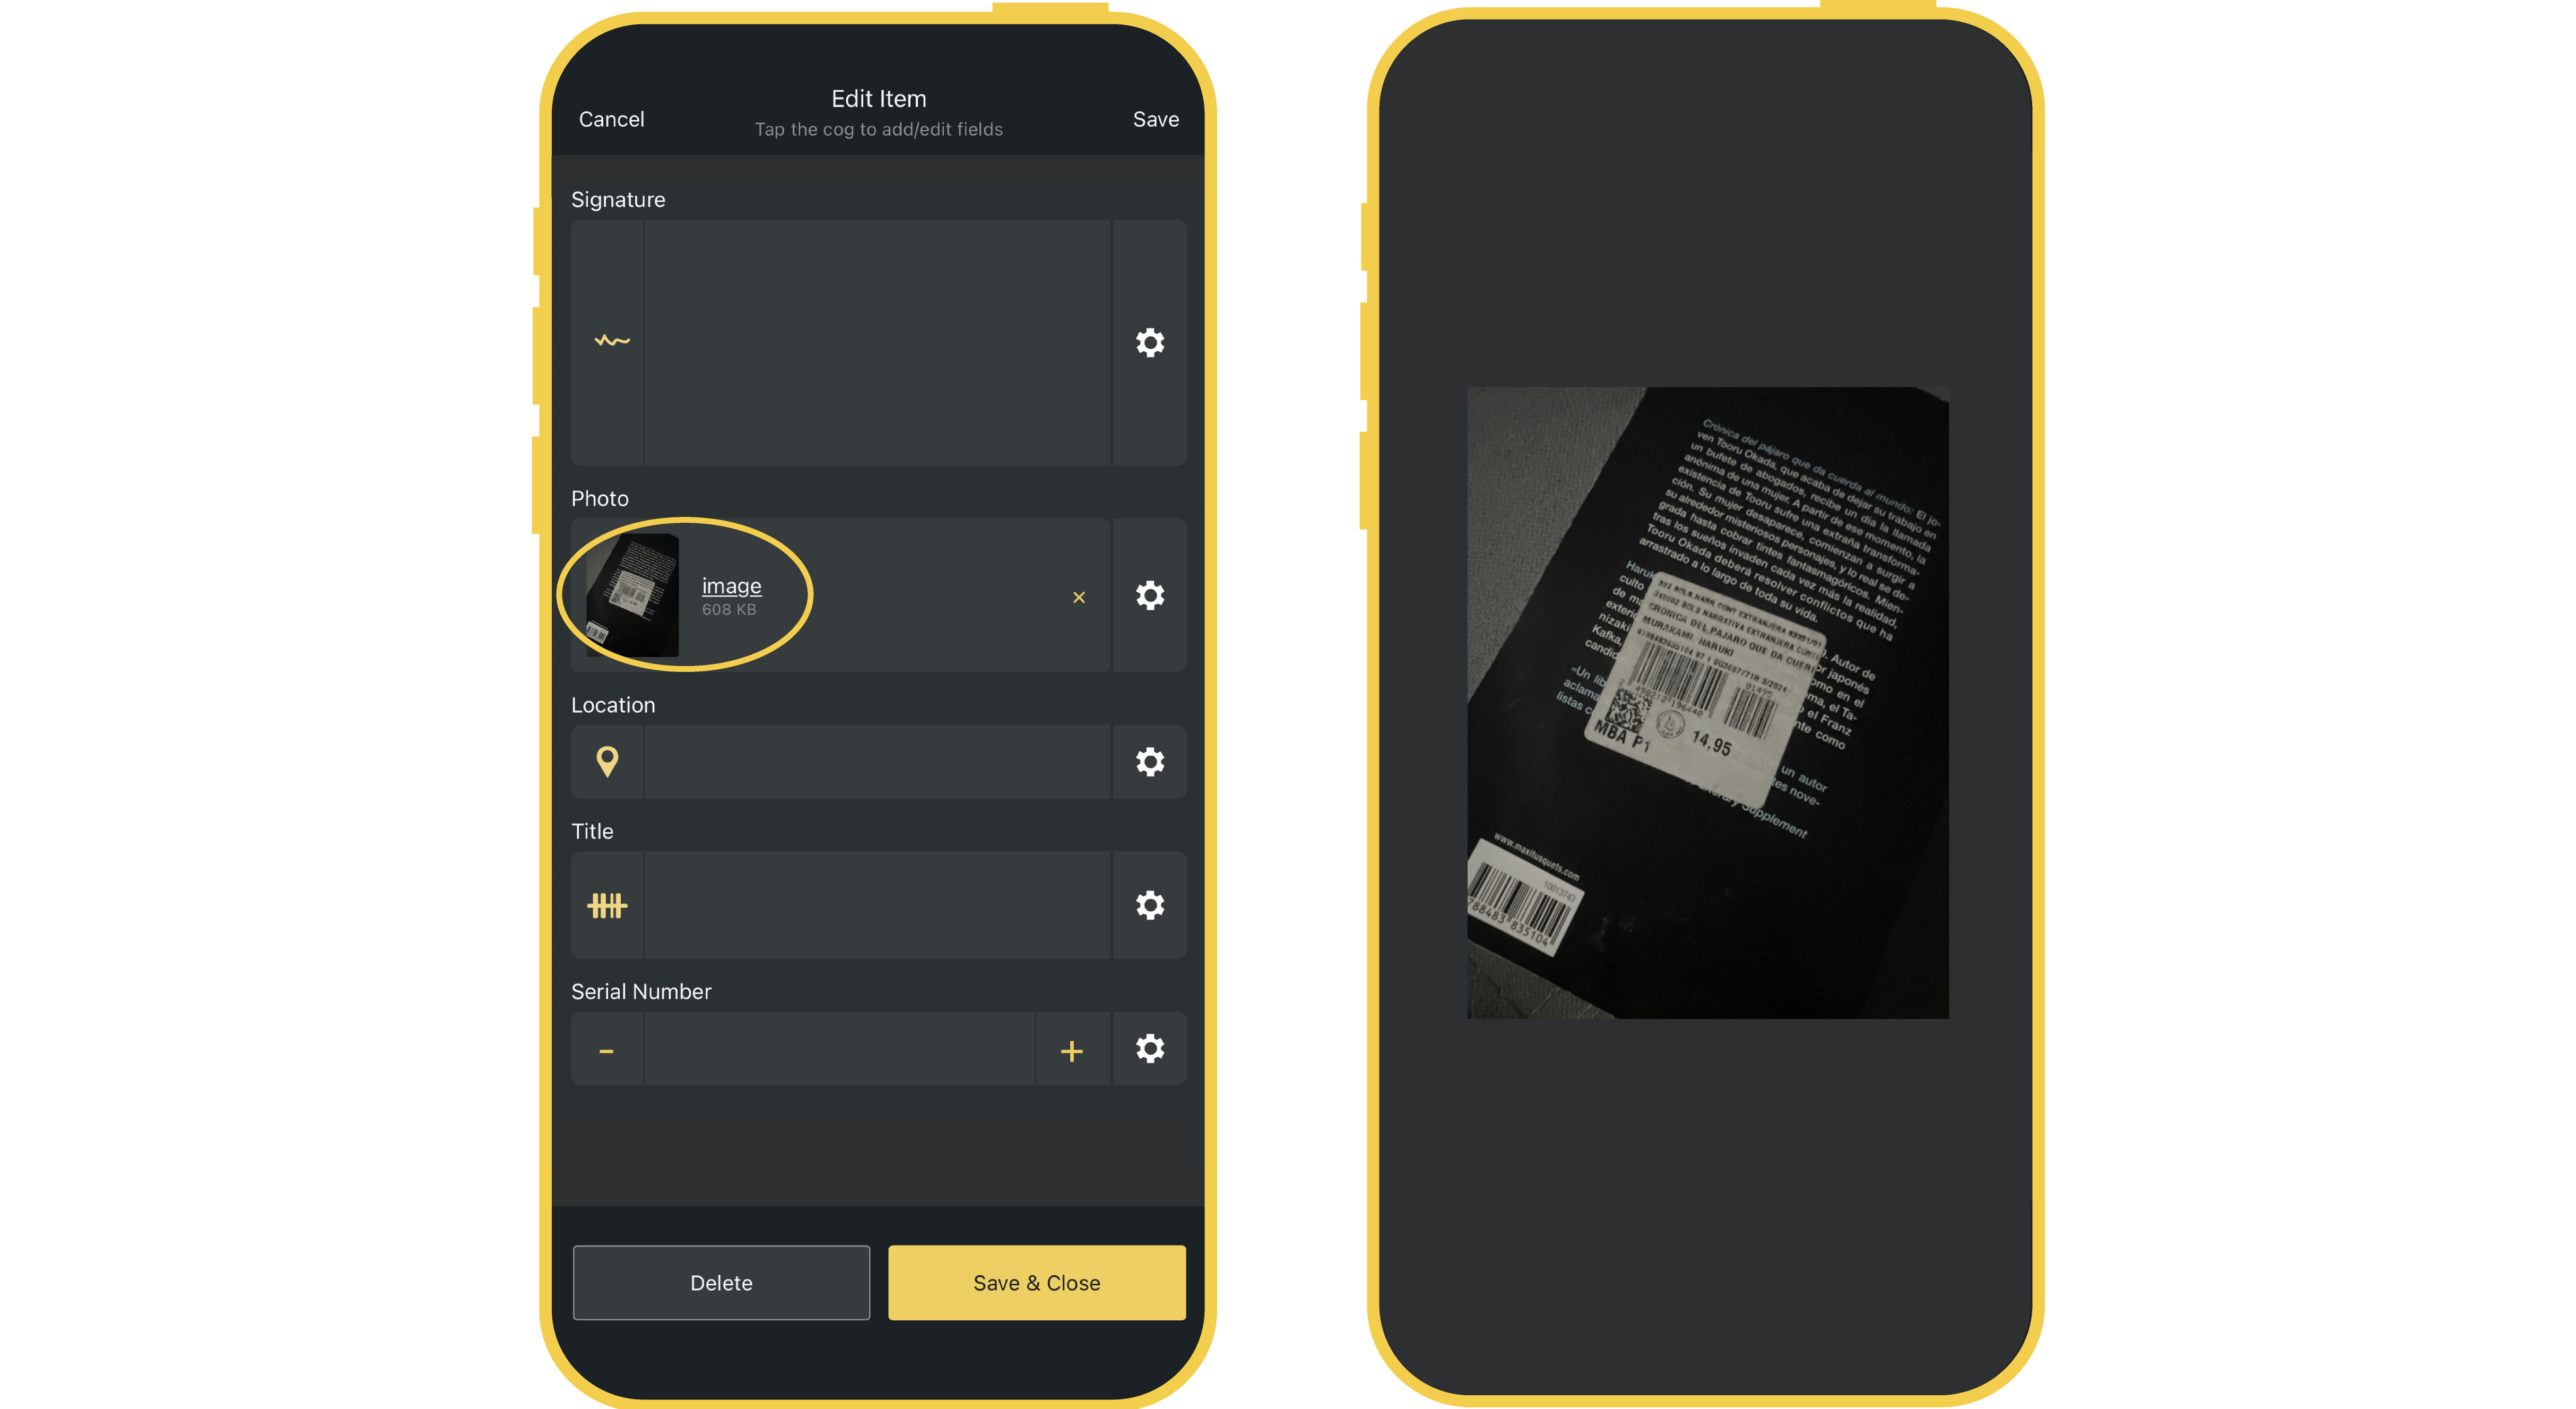
Viewing Photos on Mobile
- Open the item containing relevant field
- Tap on the image within the Photo Field to enlarge it
Viewing Photos on Web
- Locate the Photo Field in the desired row
- Click the magnifying glass icon next to the image field to enlarge it
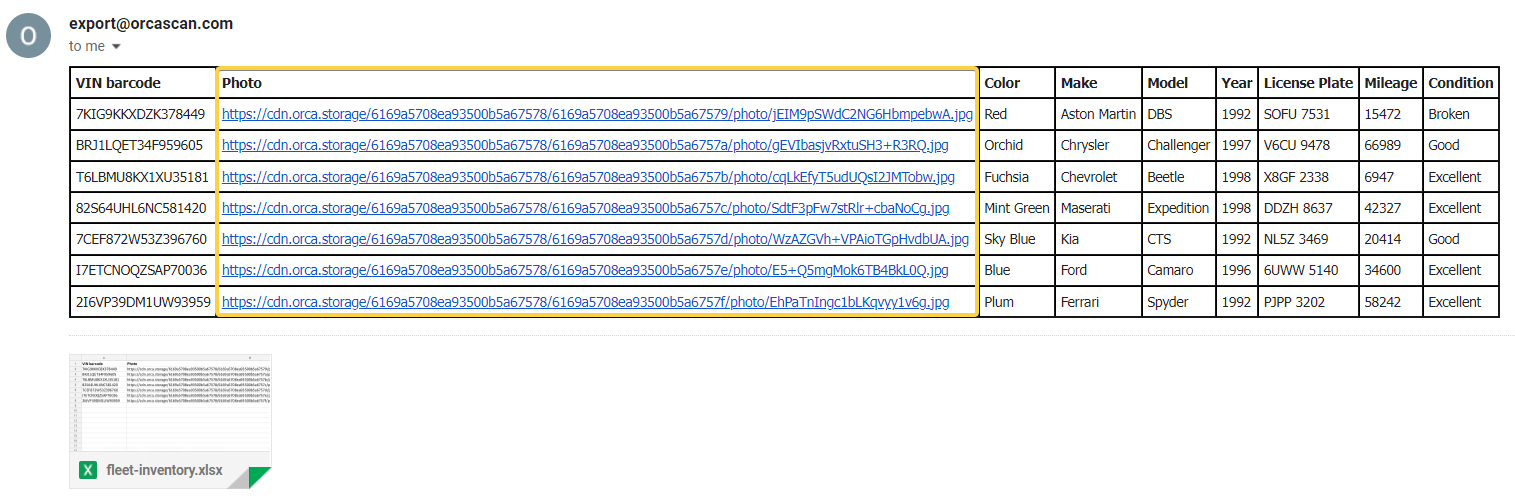
Exporting Photos
When you export a sheet containing photos, the images will not be displayed in the exported file. Instead, they will be shown as a URL. Simply click the URL to view the image.
Questions about Photo Fields?
We’re always happy to help, chat with us live or drop us an email.