
You can create a real-time link between a sheet in Orca Scan web application and Microsoft Excel. Data collected by users with the Orca Scan mobile app will then be pushed directly into your Excel sheets from anywhere in the world.
Before you begin
To get started, log in to your Orca Scan account and create a Cloud Sheet. Once you’ve done that, follow the four steps below to set up the connection.
- Get the export link from your Orca sheet
- Navigate to the Get Data section in Excel
- Paste the export link
- Set the import frequency
Steps to Scan Barcodes to Microsoft Excel
1. Go to the Integrations menu
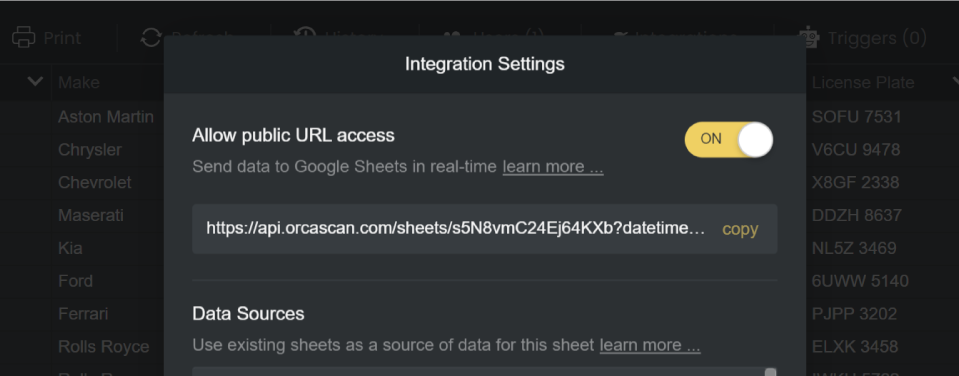
Click the Integrations settings on the sheet you want to set up

2. Activate and Copt the Public URL
Next, you need to turn on “Allow Public URL access.” This creates a link for your real-time scanned data. Copy this link to use in Excel.
3. Click Save in Orca Scan
Make sure to save your changes in the Integrations settings. This activates the connection you just set up.

Now, let’s go to Microsoft Excel.
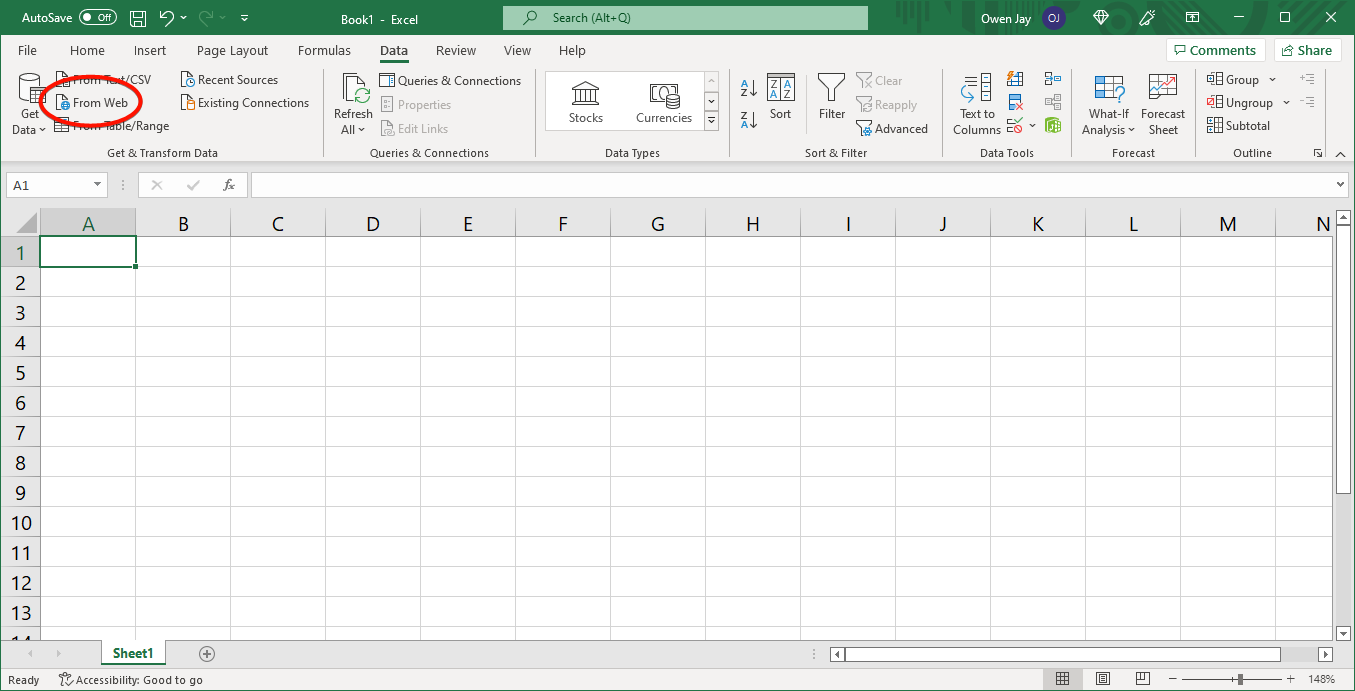
4. In Excel, Select ‘Get Data’ from Web
Now, head over to Excel. Go to the Data section in the toolbar, click Get Data, hover over From Other Sources and click From Web
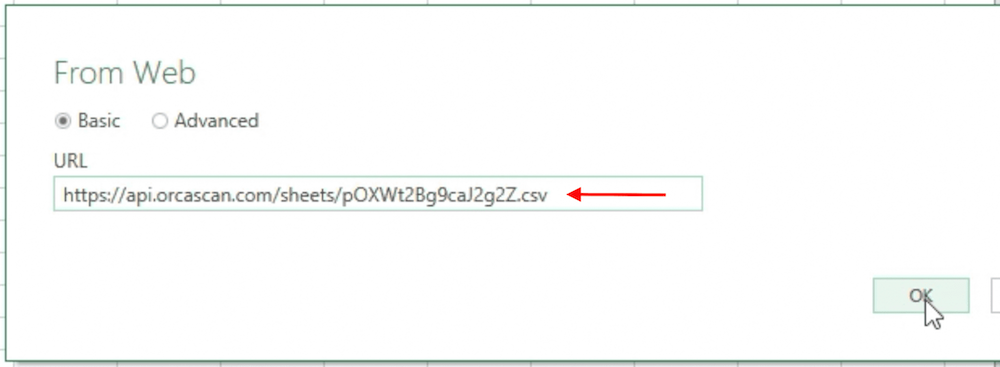
5. Paste the Orca Scan Export URL into Excel
A window will pop up. Paste the link you copied from Orca Scan here.
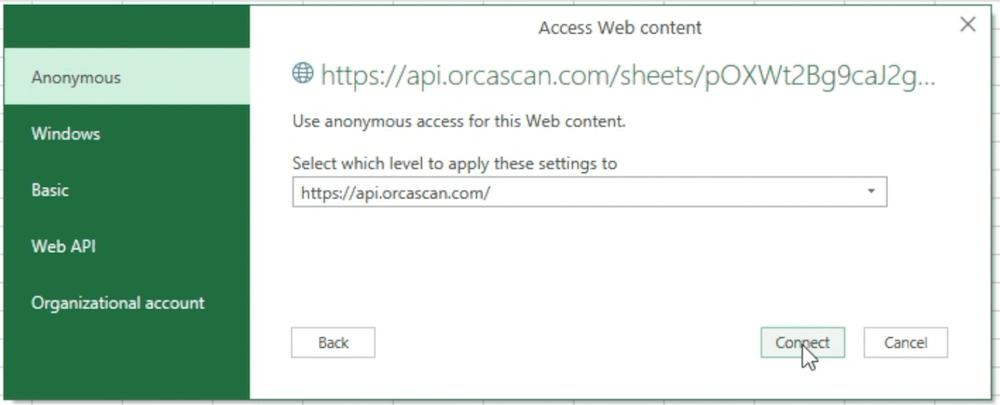
6. Approve Anonymous Access
Connect using the standard ‘Anonymous’ access. This is usually the simplest option.
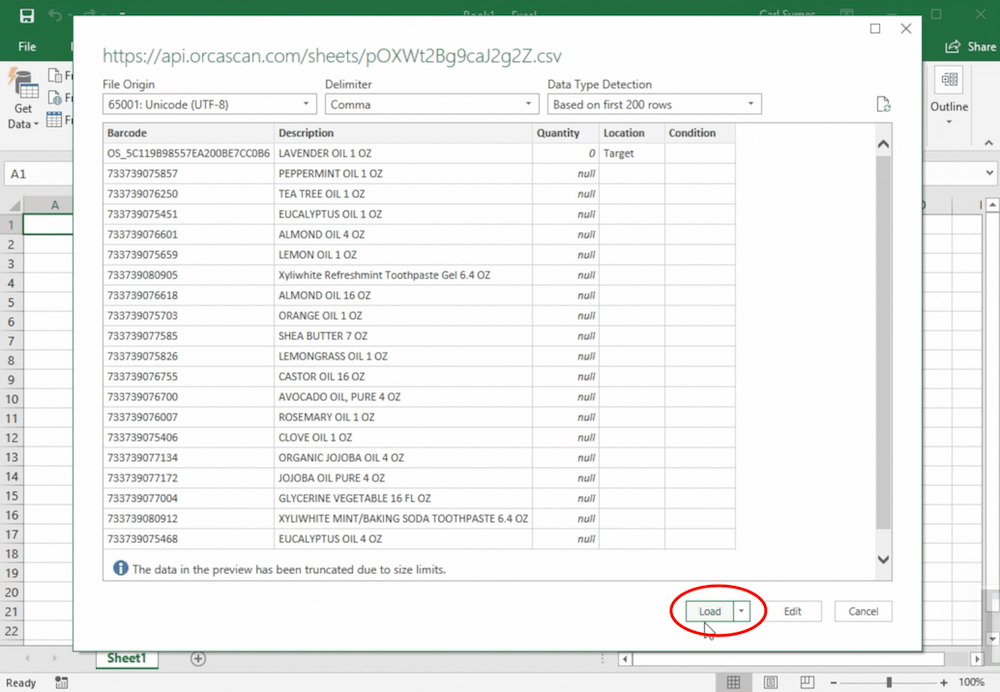
7. Import Your Barcode Data to Excel
Click ‘Load’ to bring your data into Excel.
8. Set Your Data Update Frequency
This connection automatically updates Excel with new data from Orca Scan. You can set how often Excel checks for updates. You can also refresh it manually, as seen below.

URL export configurations
You can configure the data export by appending parameters to the URL, for example:
| URL parameter | Description |
|---|---|
sortby=barcode&sortorder=desc |
Sort output by column |
.html / .csv / .json / .xml |
Change output format |
transactions=true |
Include audit trail |
deltas=true |
Include deltas for numeric columns |
datetimeformat=DD/MM/YYYY |
Change date format |
timezone=-03:00 |
Change time zone |
Important: always use a ? before the first parameter and an & before each additional parameter, for example https://api.orcascan.com/sheets/sJ0KYsnp-9b7Rl7i?transactions=true&deltas=true
That’s it!
Your Excel spreadsheet will now reflect all the information in your Orca Sheet. So if you add, update or delete a row inside Orca Scan, Excel will pull those changes into your Excel Spreadsheet.
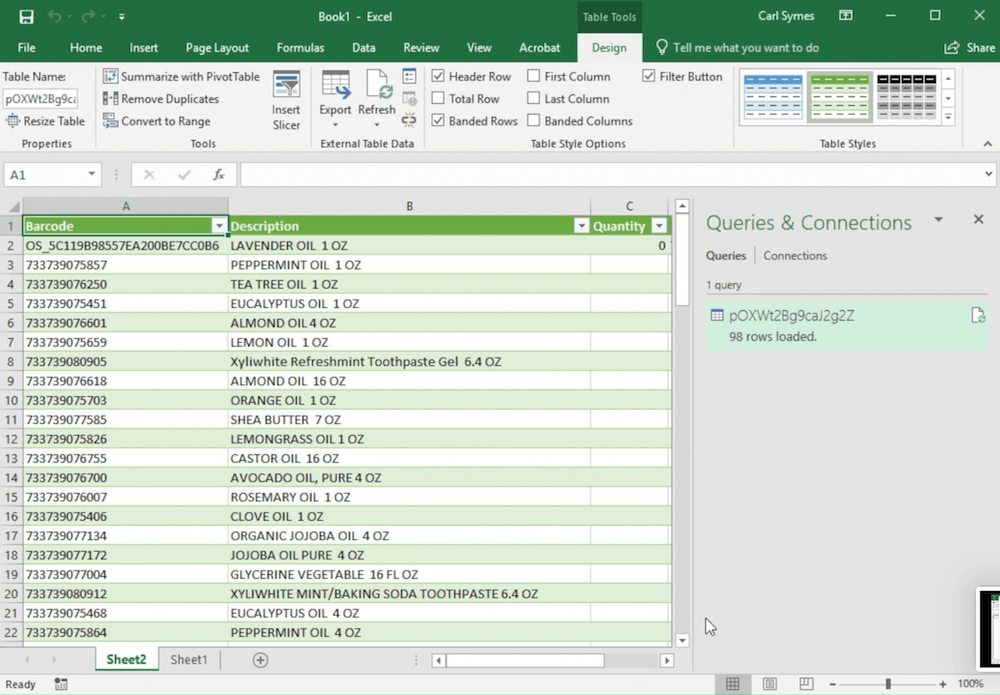
Important note: Clearing your Orca Sheet will also clear the data from your Excel Spreadsheet.
Questions scanning barcodes into Excel?
We’re always happy to help, chat with us live or drop us an email.
Request an integration
Need help getting Orca Scan working with your software? Request a Software Integration
