The Dymo LabelWriter 450 is a compact direct thermal label printer compatible with Orca Scan. Its fast, high-quality printing and easy USB connection make it ideal for offices, warehouses, and small businesses where reliable on-demand labelling is essential.
Dymo LabelWriter 450 specs
- Thermal printer (no ink or toner required)
- Supports 20+ different label sizes
- Compact size measuring 5x7” 1/2”
- Can print up to 51 labels per minute
- Compatible with Windows and Mac
Dymo LabelWriter 450 setup guide
How to set up the Dymo LabelWriter 450 to Windows
- Go to www.dymo.com/support
- Download Dymo installation files for Windows (DCD Windows v1.4.2)
- Go to your downloads folder
- Open DCDSetup1.4.2.82.exe
- Follow installation instructions
How to set up the Dymo LabelWriter 450 to Mac
- Go to www.dymo.com/support
- Download Dymo LabelWriter 450 installation files for Mac (DCD macOS v1.4.2)
- Go to your downloads folder
- Open DCDMac1.4.2.69.pkg
- Follow installation instructions
How to load labels into the Dymo LabelWriter 450
The Dymo LabelWriter 450 uses direct thermal labels in various sizes. You can find recommended labels on the Dymo website.
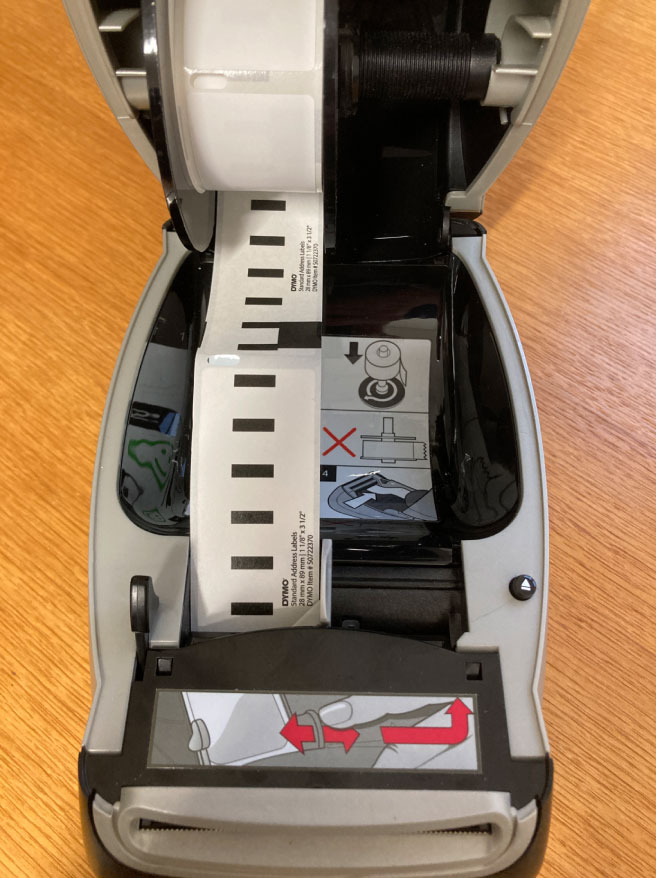
To load your labels:
- Open the top cover with the printer plugged in
- Remove the roller holder
- Add the new label roll (ensure label is facing down and black lines facing upwards
- Close the top of the printer
- Print a single label first as a test
Tips:
- The label roll must fit snugly against both sides of the spool to feed correctly
- Always align the left edge of the label with the feed slot to precent misfeeds
How to print barcodes using the Dymo LabelWriter 450
You can print barcodes from your Orca Scan sheet directly to the Dymo LabelWriter 450 via Mobile or Desktop. Follow our ‘Print Barcodes’ guide for more information on how to do this.
If you’re using Avery labels, follow these steps after selecting the barcodes you want to print and clicking ‘Print Labels’:
- Choose the Avery label size to match your labels
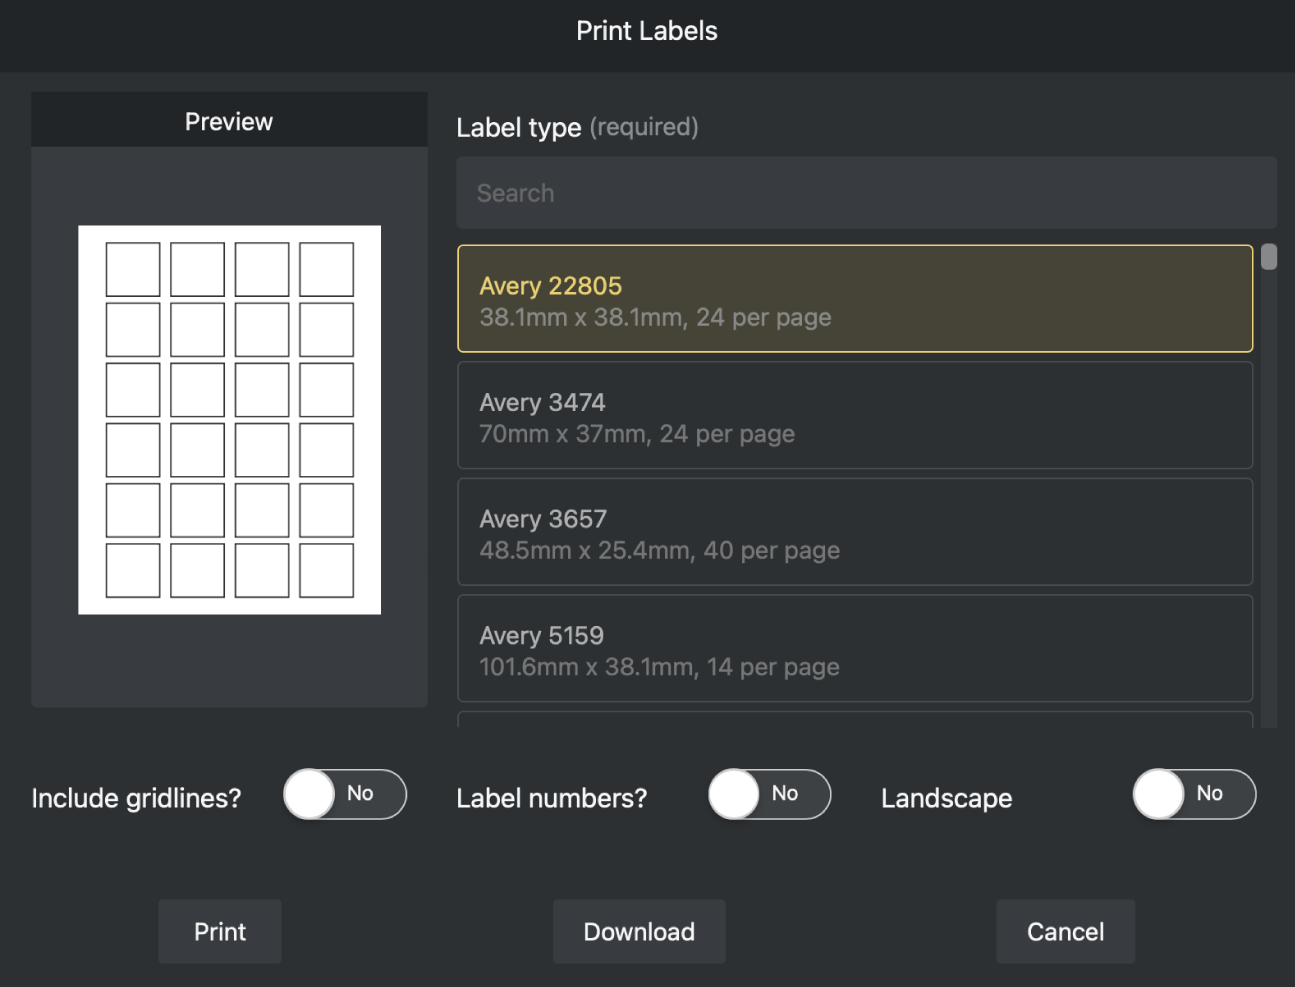
- Click Print
- Select your Dymo LabelWriter 450 printer
- Click Print
Dymo LabelWriter 450 Troubleshooting
How do I fix labels jammed in the Dymo LabelWriter 450?
Printer jams typically happen when labels become wrapped around the roll that feeds the labels out of the printer. It can be tricky to clear if there are a lot of labels, and you could damage the printer, so please be careful. To clear a printer jam on the Dymo LabelWriter 450:
- Unplug the printer from its power source
- Open the top of the printer
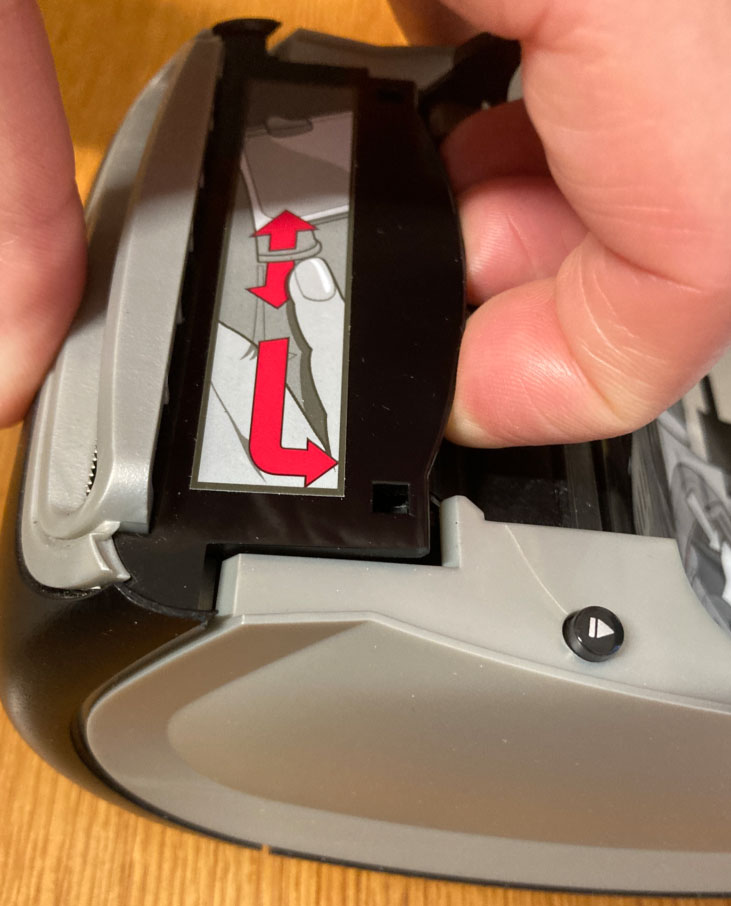
- Remove any labels still in the feed system and pull this lever forward, which will let you manually remove the labels
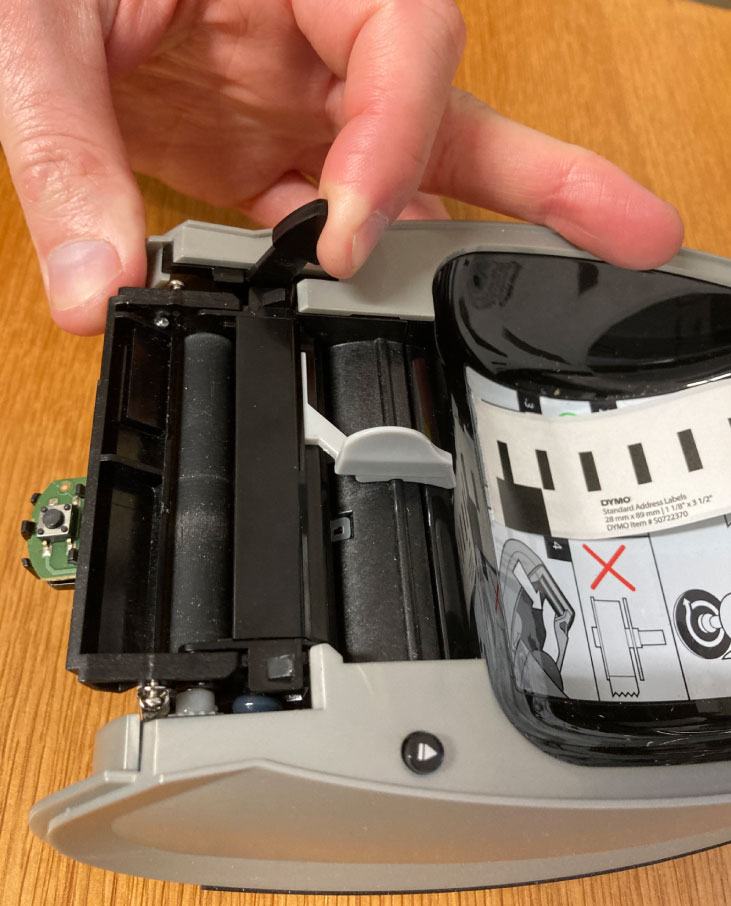
- Remove the front cover. This isn’t easy, it might feel like you are going to break it so be careful
- With two or three fingers (not one! the plastic can crack) remove the front cover by gently lifting it a few millimetres at a time, and then pulling it towards you
- The rubber roller is difficult to move manually but you’ll need to in order to get it free
- Cut the label in one line from one end to the other along the length of the roller
- Once this is done, peel off the labels as best you can
- This can be a long process depending on how many labels are wrapped around the reel
- Once this is cleared, put the front back on
- Reload the label roll
- Try printing again
Tip: If the printer does not feed the labels, ensure the first label is fully inserted, then press the form-feed button. If the first label on the roll is partial, press the form-feed button to eject it before printing.
Dymo LabelWriter 450 related questions?
We’re happy to help troubleshoot any issues you may have using Orca Scan with the Dymo LabelWriter 450, chat with us live or drop us an email.