
You can use Zapier to create a real-time link between Orca Scan and your Shopify store to create your own customised inventory management system.
In this guide, you’ll be shown how to build automation to create new products in Shopify when scanning new items into your Orca Scan inventory using the magic of Zapier.
Please note that Shopify is a premium app in Zapier and will require you to upgrade to a paid plan.
How to Connect Orca Scan and Shopify
To get started, log in to your Orca Scan account and have the sheet you want to connect ready. Then, log in to your Shopify store, log in or create an account with Zapier, and head to the dashboard to create a Zap.
Once done, use the following steps:
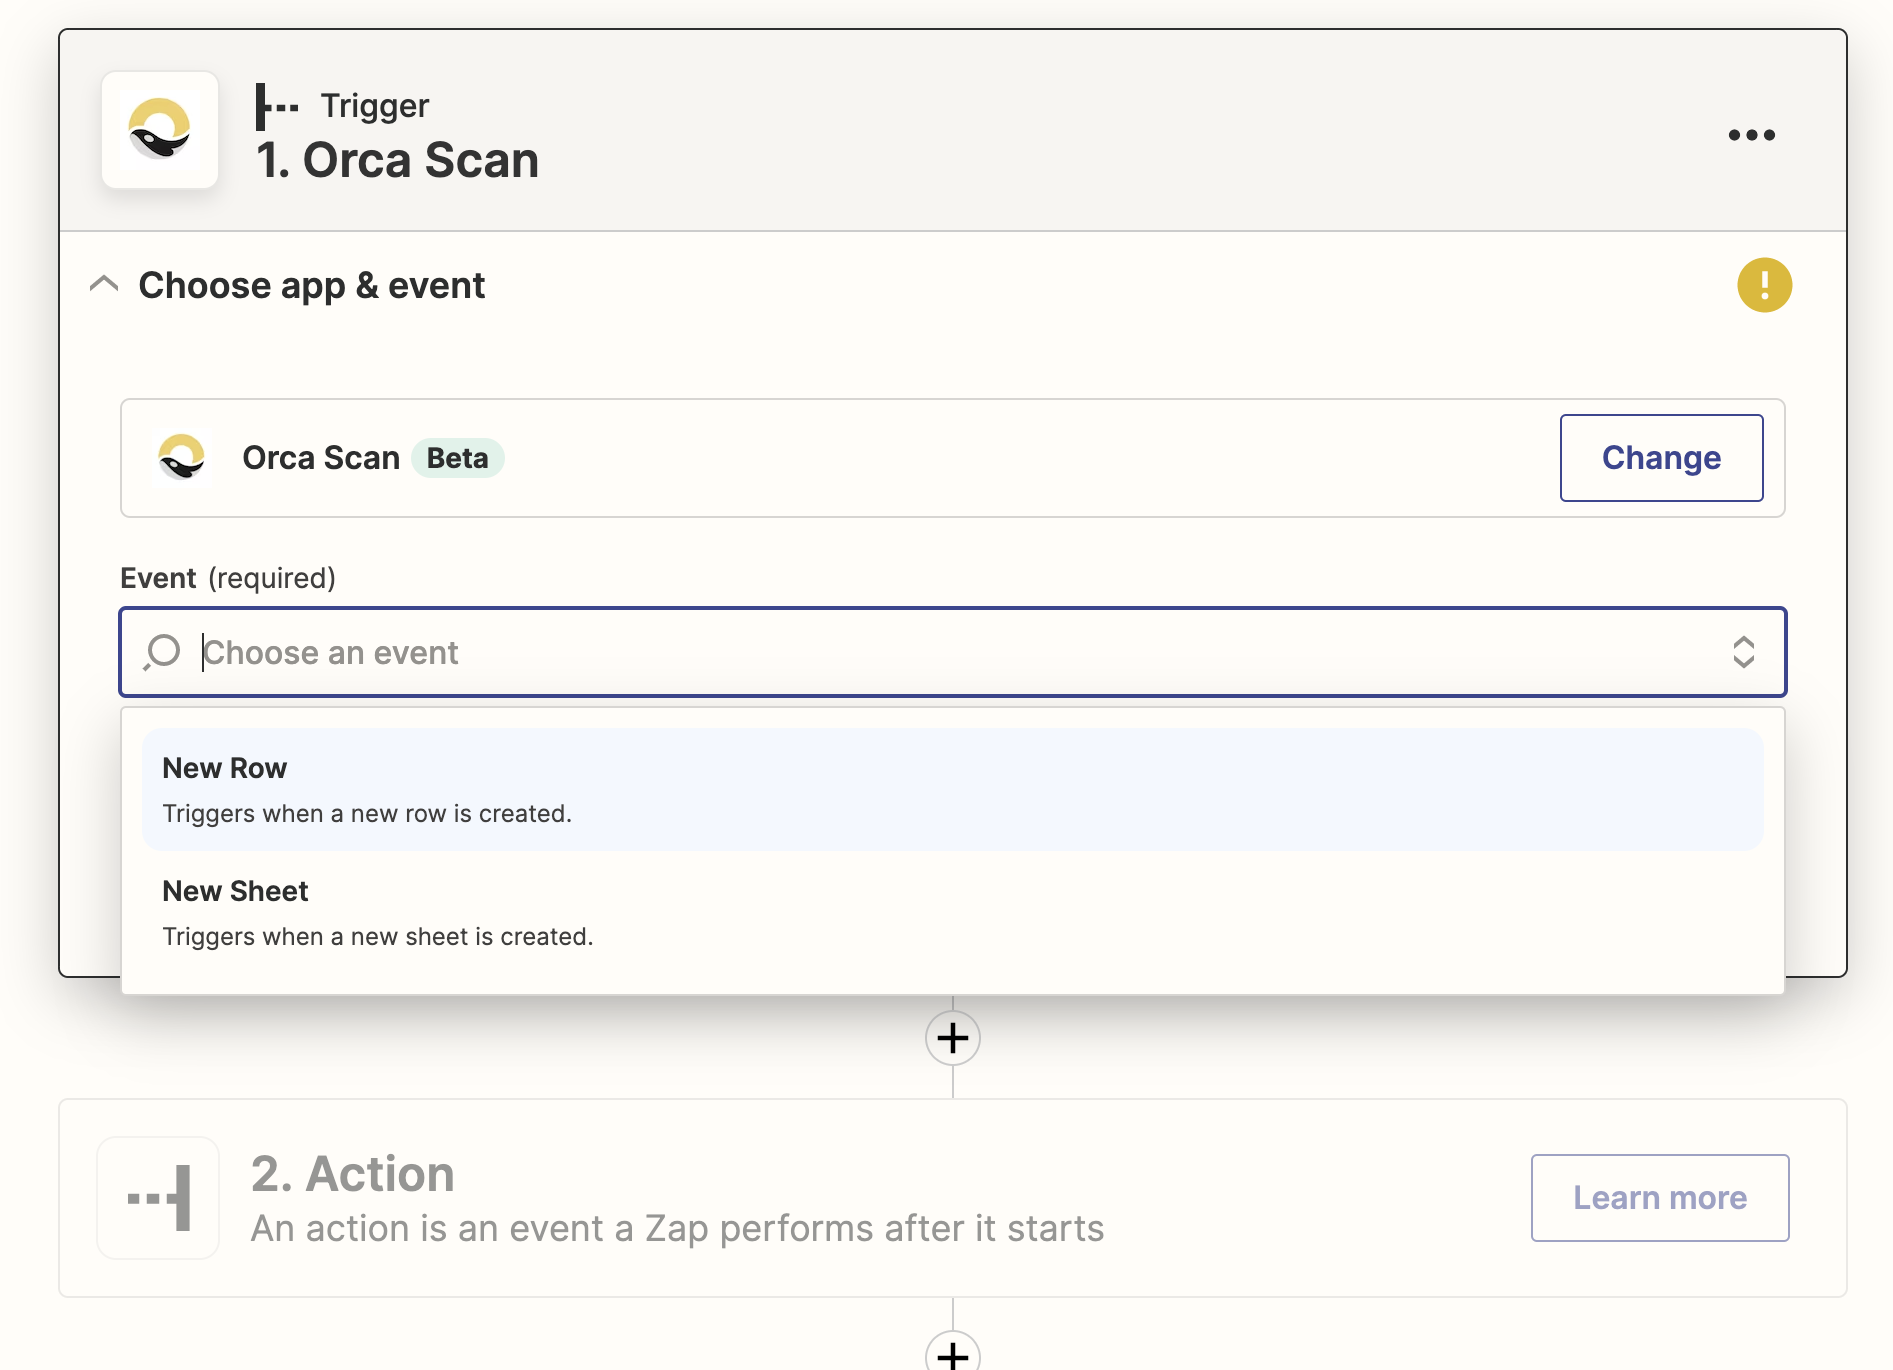
- Select the Orca Scan app as the trigger
- Choose the New Row event, log in to your Orca Scan account using your API key and find the Orca Sheet you want to send data from
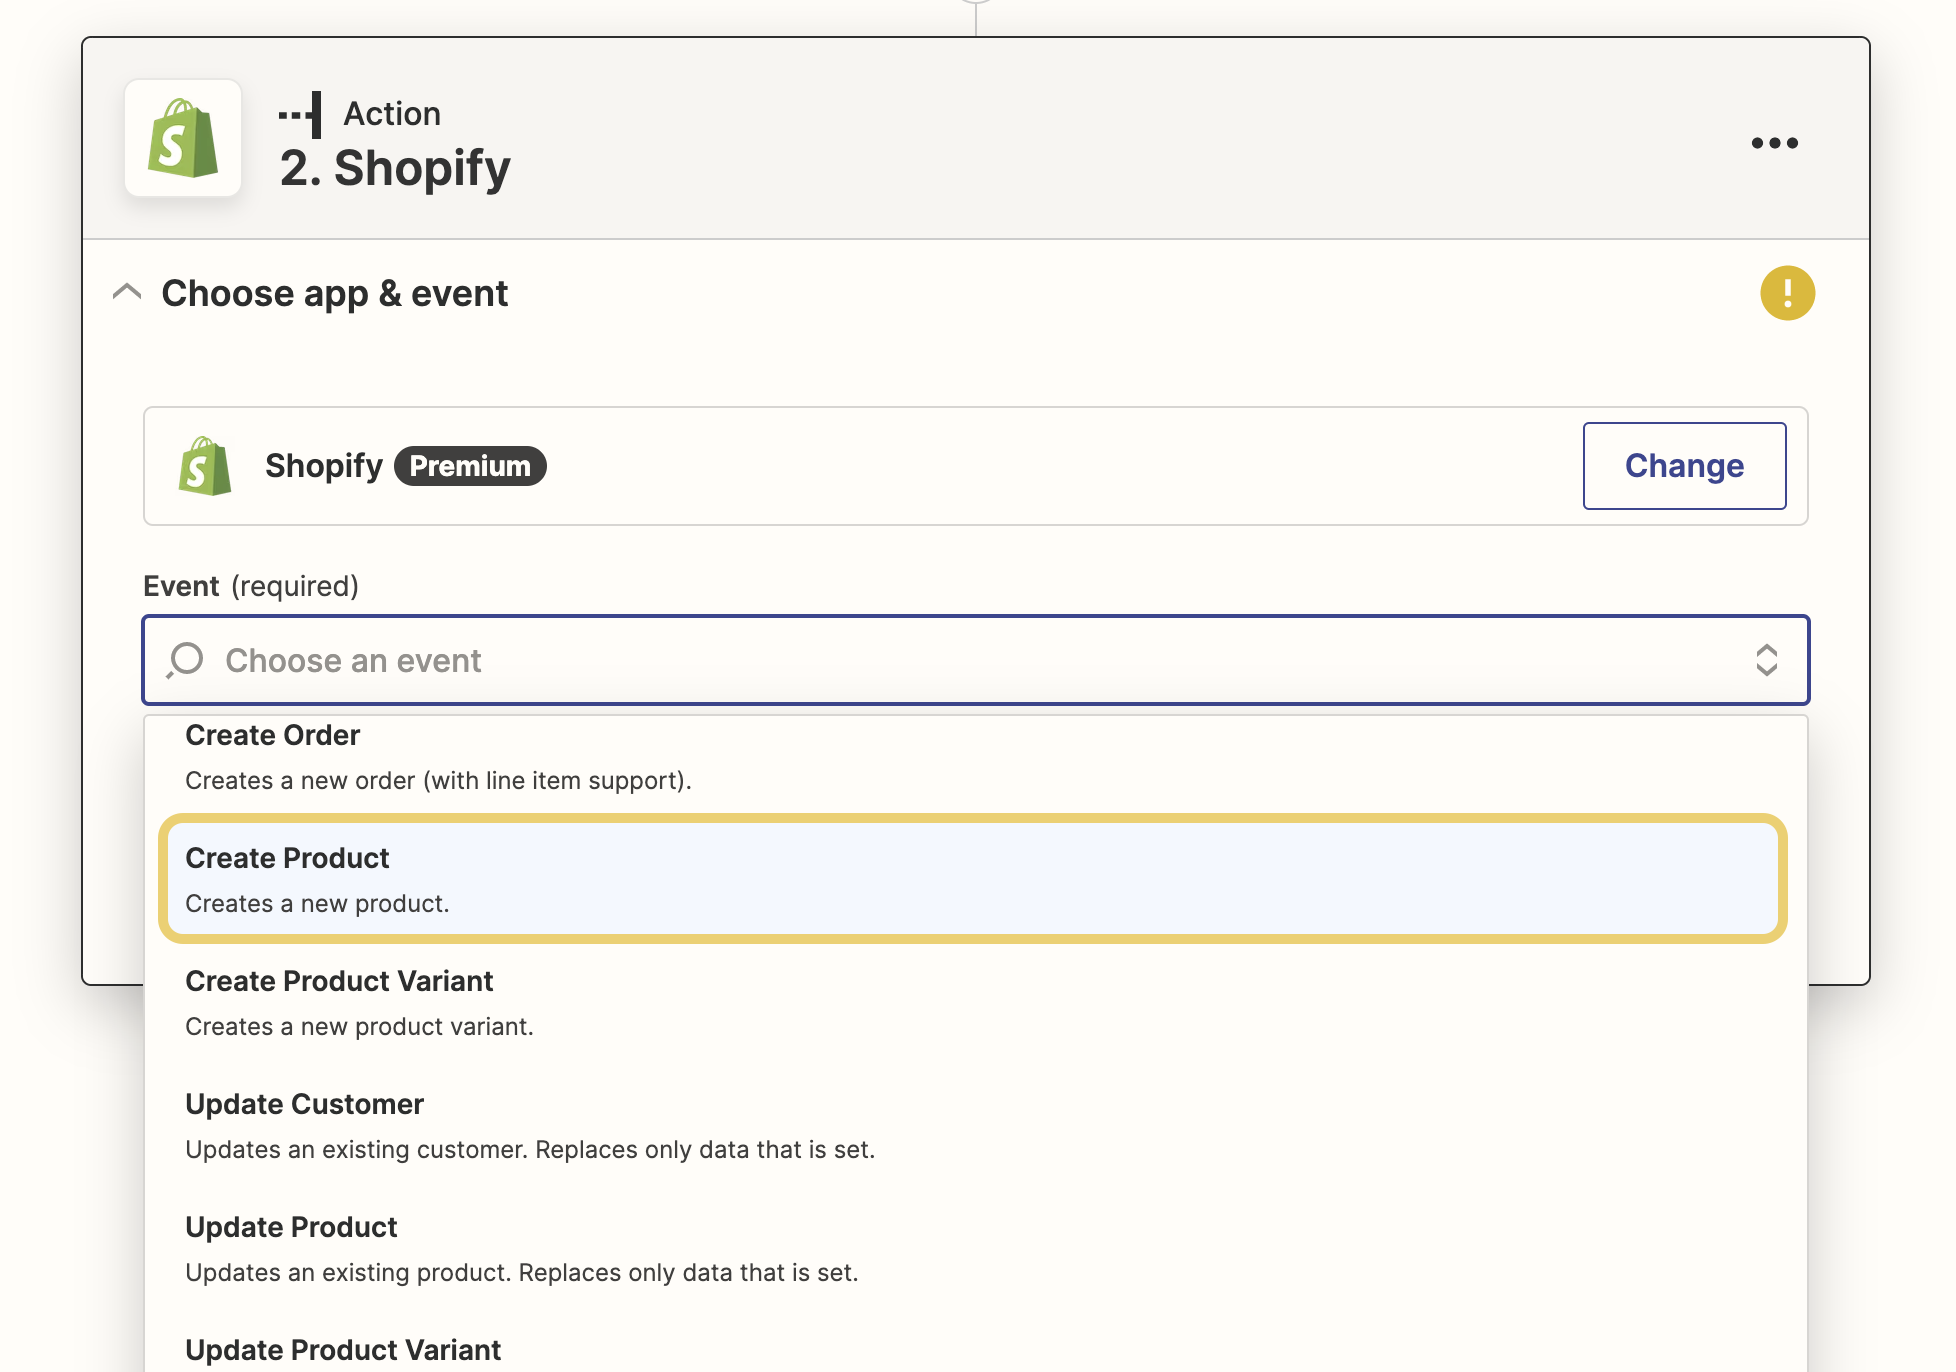
- Select the Shopify app as the action
- Choose the Create Product event, log in to your Shopify store using your Shopify username to install the unlisted Zapier app
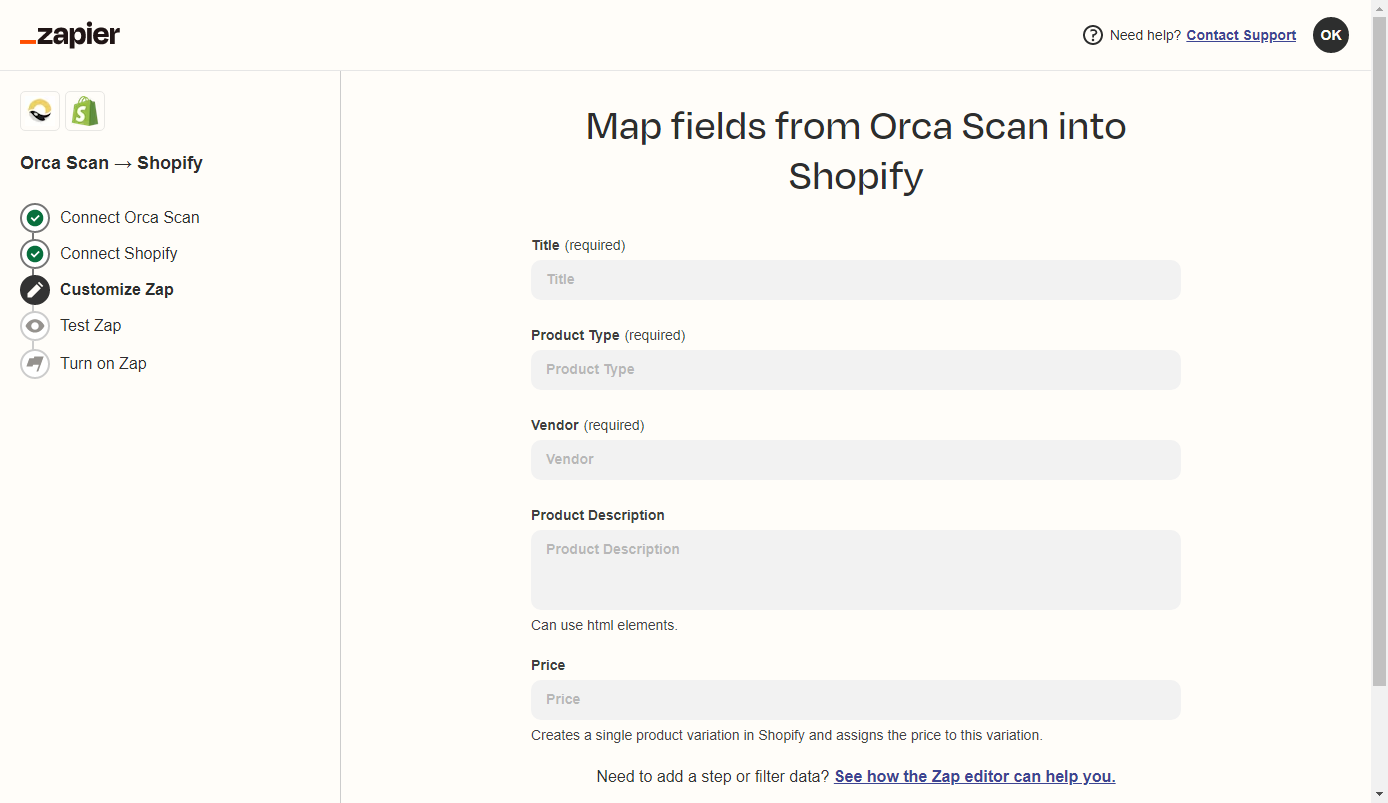
- Map out and match the Shopify product listing fields to the Orca Scan fields you data from (only use the ones you want to update with)
Please see our walkthrough guide on how to add Orca Scan into Zapier as a trigger or as an action. For further help and troubleshooting, check out Zapier’s help centre.
1. Setting up Orca Scan as a trigger
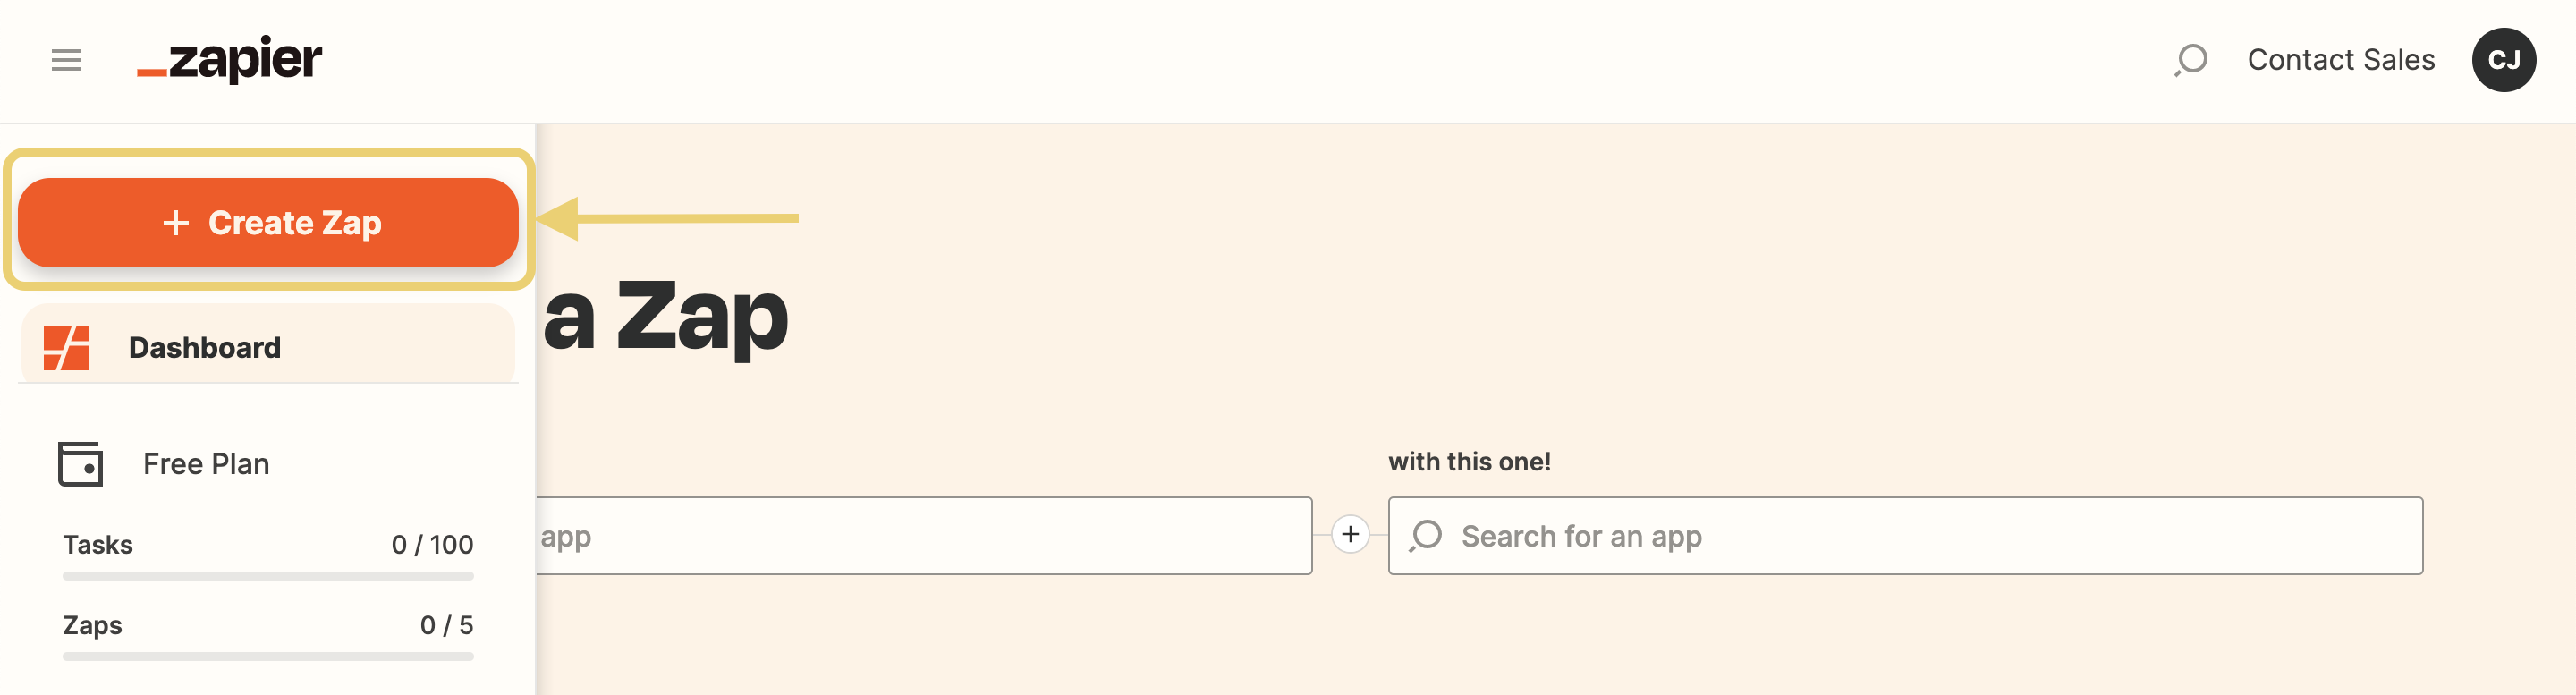
- Log in to Zapier and start by hitting the Create Zap button on the sidebar of the dashboard. This will take you directly to the Zap editor, where you can set up the trigger events
- Now we need to define which events need to be listened to in Orca Scan by selecting the New Row event. This means that when a new item is scanned into Orca Scan, creating a new row in the sheet, the data from that row will be uploaded into Shopify as a new product
- Next, you need to establish a connection with the trigger app with Zapier, in this case, it’s Orca Scan, so sign in to your Orca Scan account and enter your Orca Scan API key (you can find this by signing into the web app, hitting the dropdown menu in the top right corner and heading over to Account Settings)
- Once Zapier is connected with Orca Scan, select the Orca Sheet that you want to send data from and continue to test the trigger. This will pull through data from the most recent row created in your Orca Sheet
2. Setting up Shopify to make an action
- Once the trigger has been tested and is working, you can proceed to the action. Begin by searching for the Shopify app and select it (it’s a premium app, so you’ll need to be on a Zapier paid plan). Then select the action as Create Product
- To progress further, you’ll need to connect to Shopify by signing in with your Shopify username, which can be found under store details
- When you’re logged in, you may get taken to a page in the Shopify dashboard that tells you that “Zapier hasn’t been reviewed by Shopify” if so, hit Install unlisted app

- Once a connection has been established, you’ll be redirected back to Zapier to select your Shopify account (you may have multiple)
Pulling Data from Orca Scan Sheets
Once you have set up the configuration between Zapier, Shopify, and Orca Scan, you need to input the data fields from your Orca Scan sheets. To do this, follow these four easy steps 👇
- As soon as you click a field, you should see a list of the Orca Scan data fields available. Select which data fields you want to add to each Shopify field
 Pro tip: Each field can contain more than one Orca Scan data field, as well as numbers and plain text. Feel free to get creative!
 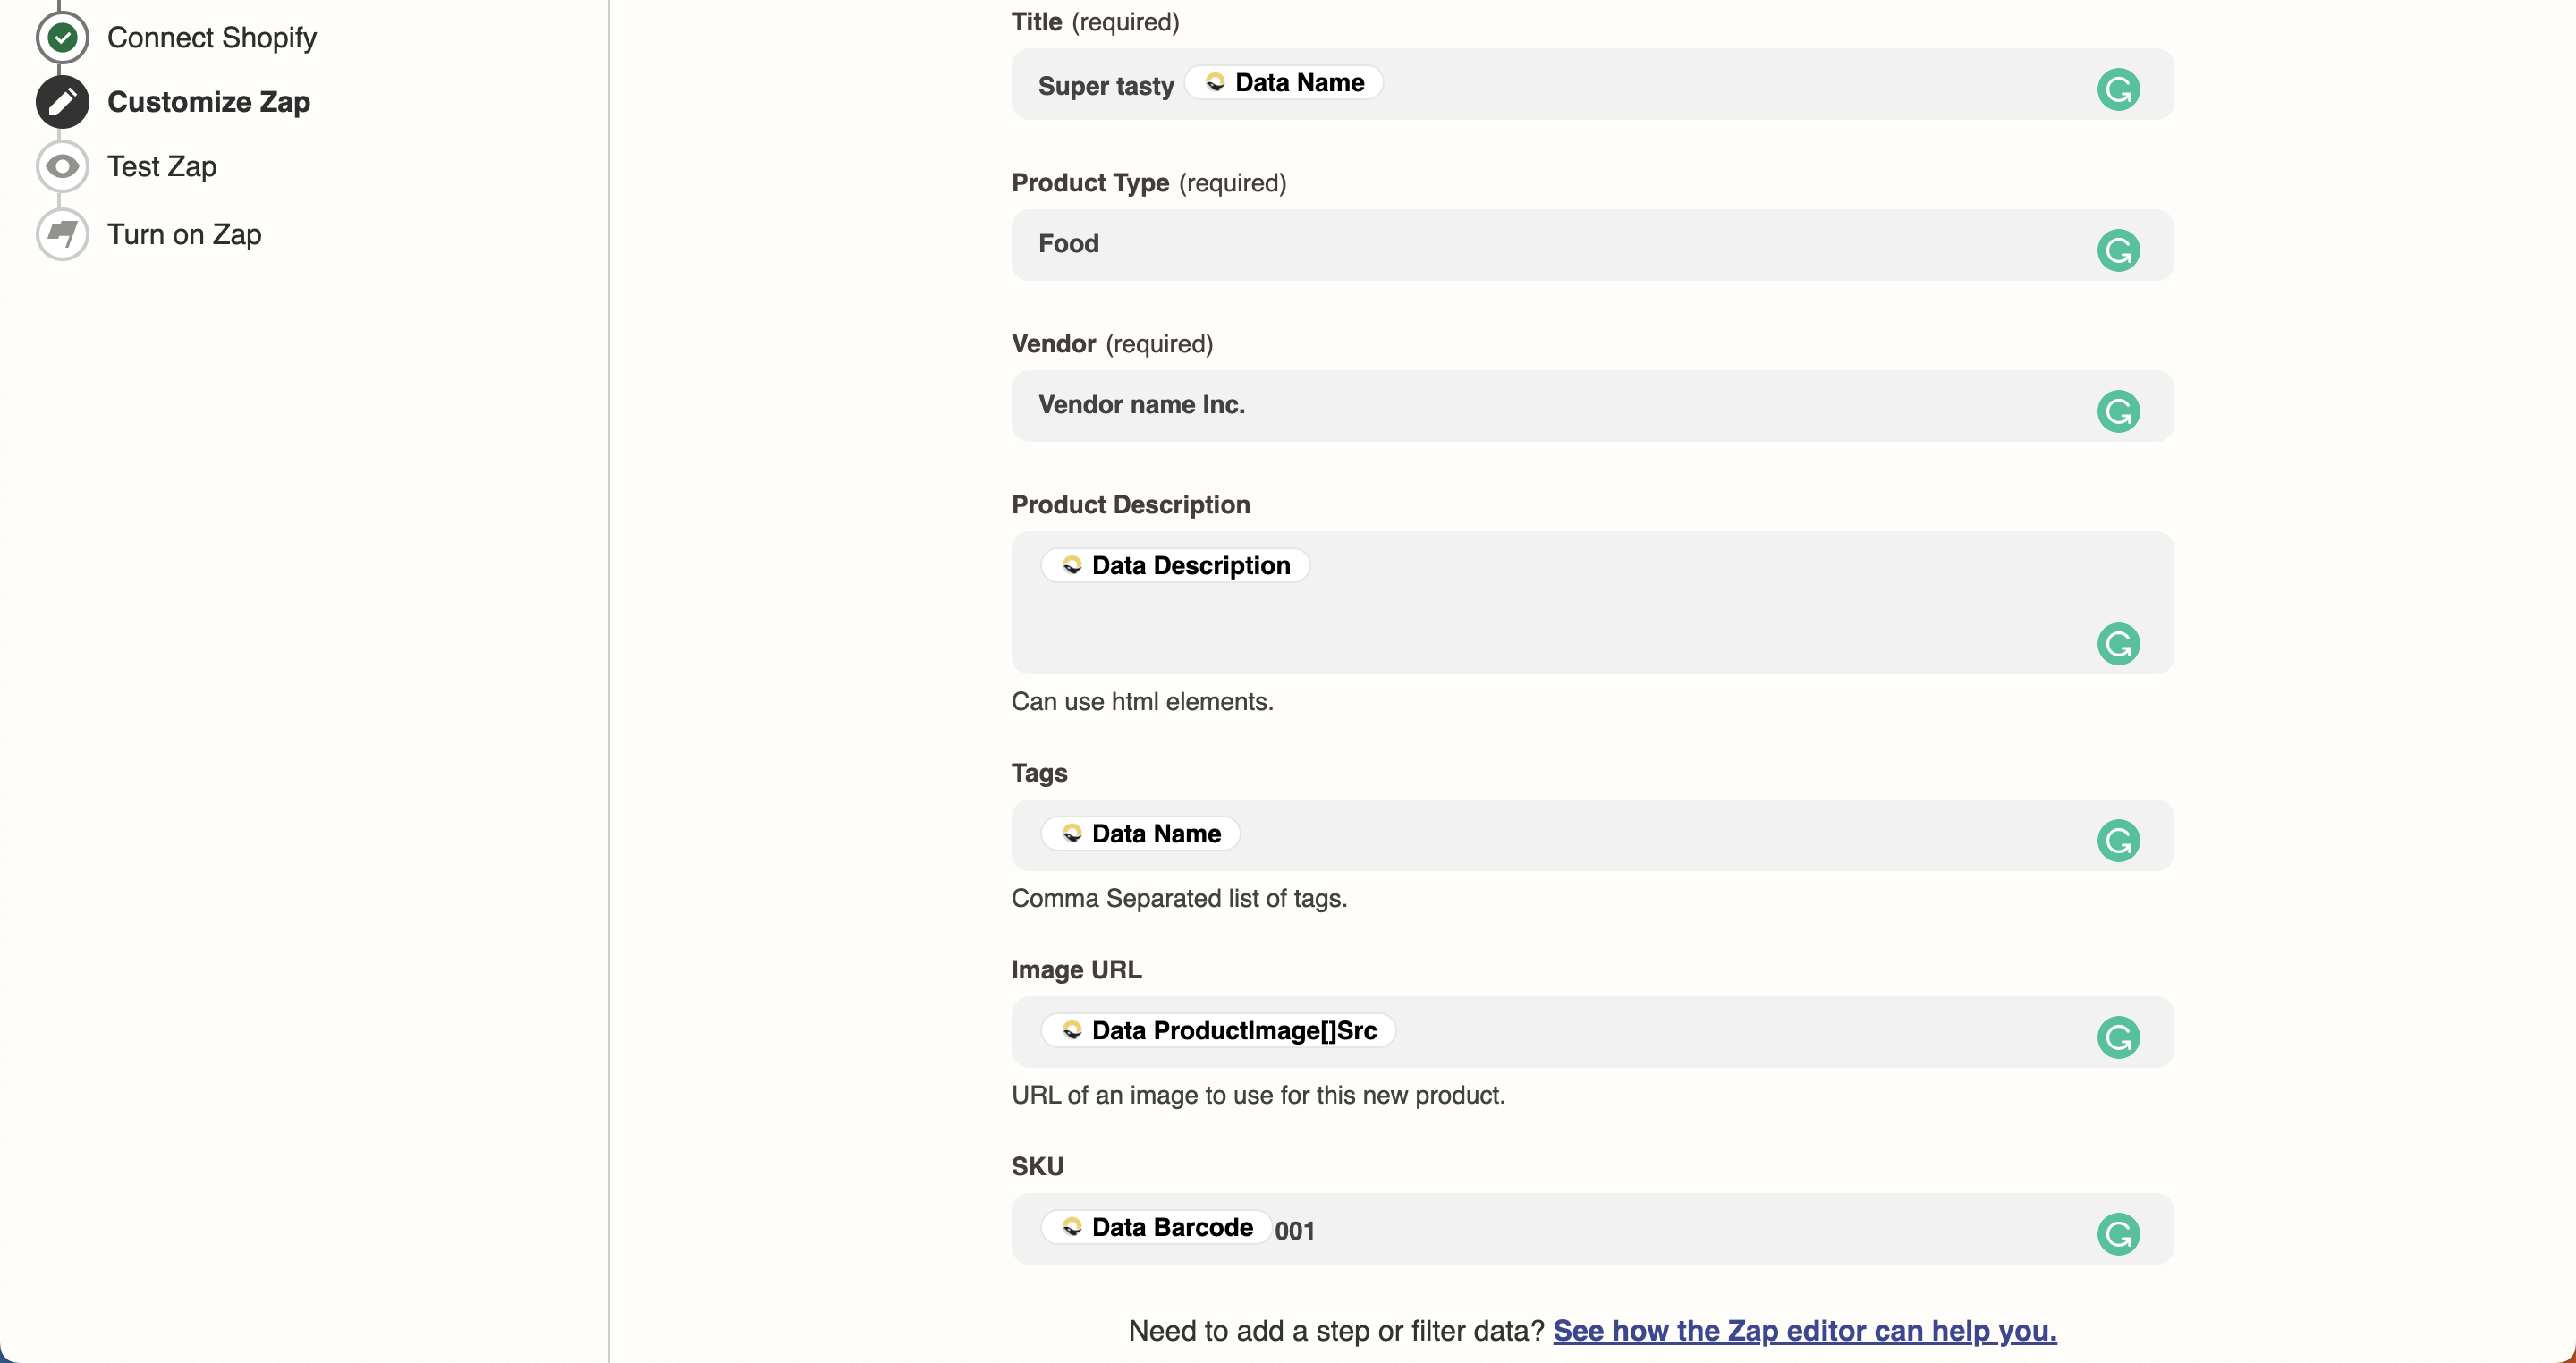 Pro tip: Customise your scanner by adding a photo field and set it to required to capture product images upon scanning so that Zapier can automatically set them as the product image in Shopify. Also, enabling the editing of the SKU (Stock Keeping Unit) field allows a faster and unique way to identify products in inventory and for search crawling for your site.
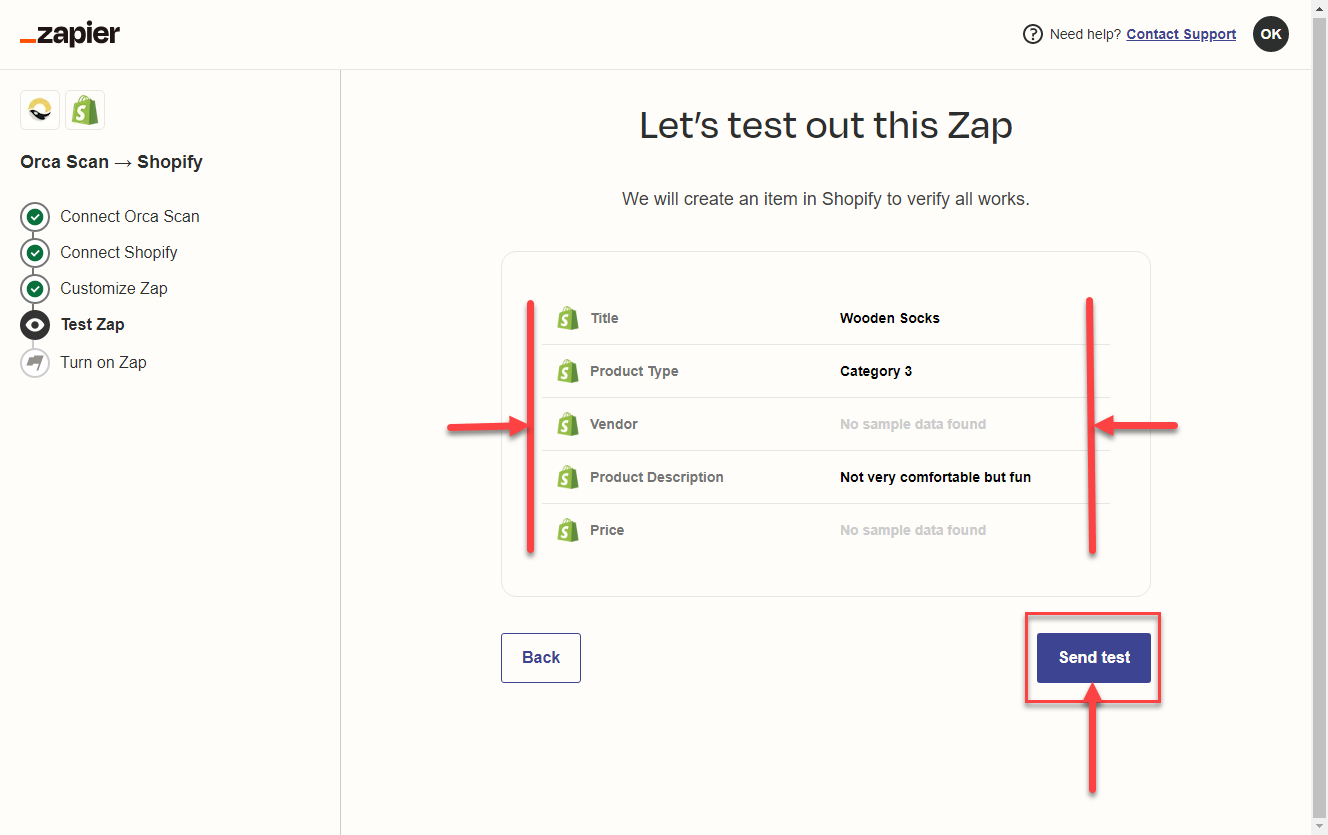
 - Once you’re happy with the mappings, click Next Check that everything is set up as you wish, and click the Send Test button
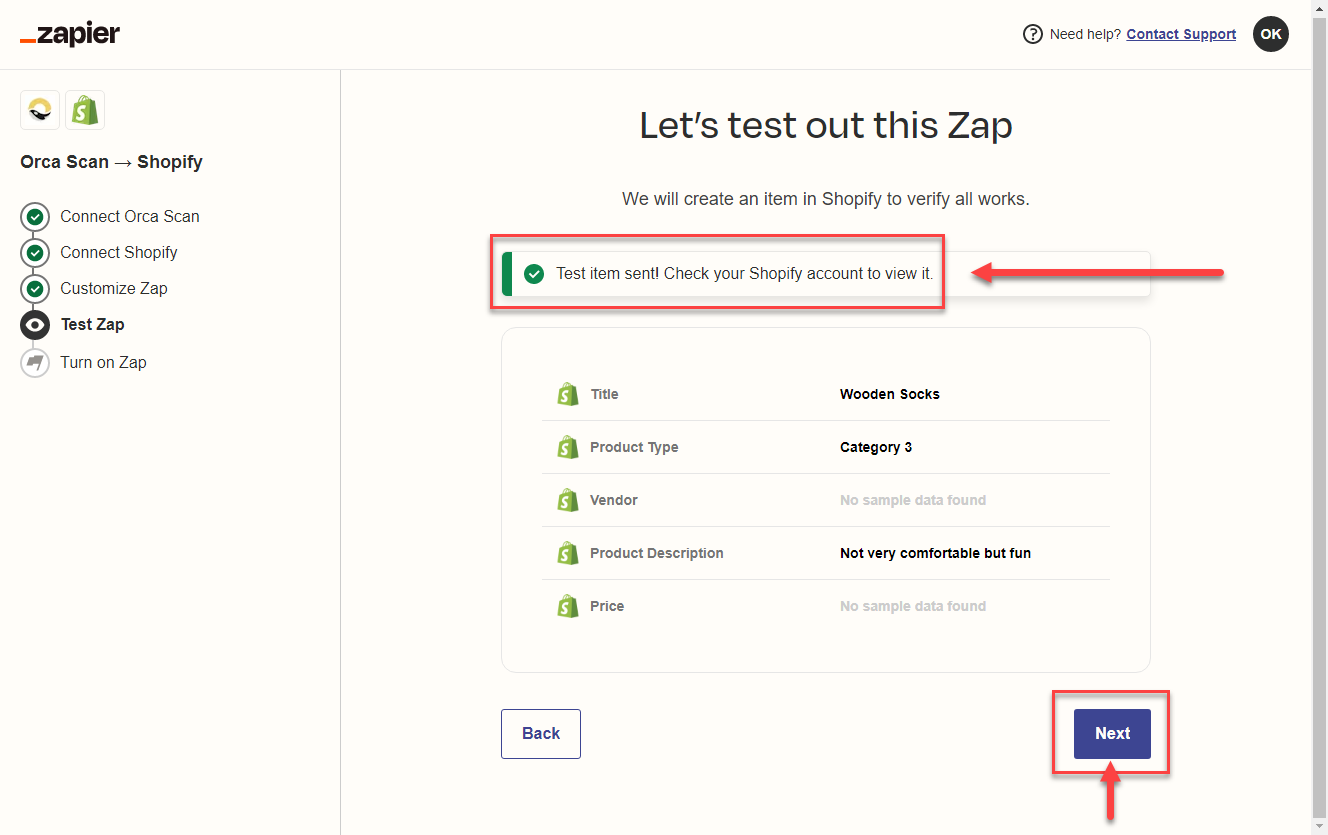
- After a successful test, head over to your Shopify store to verify that a new product has been created. Click the Next button to turn on your newly created Zap
- Once Shopify is verified, you can finally click Turn on Zap
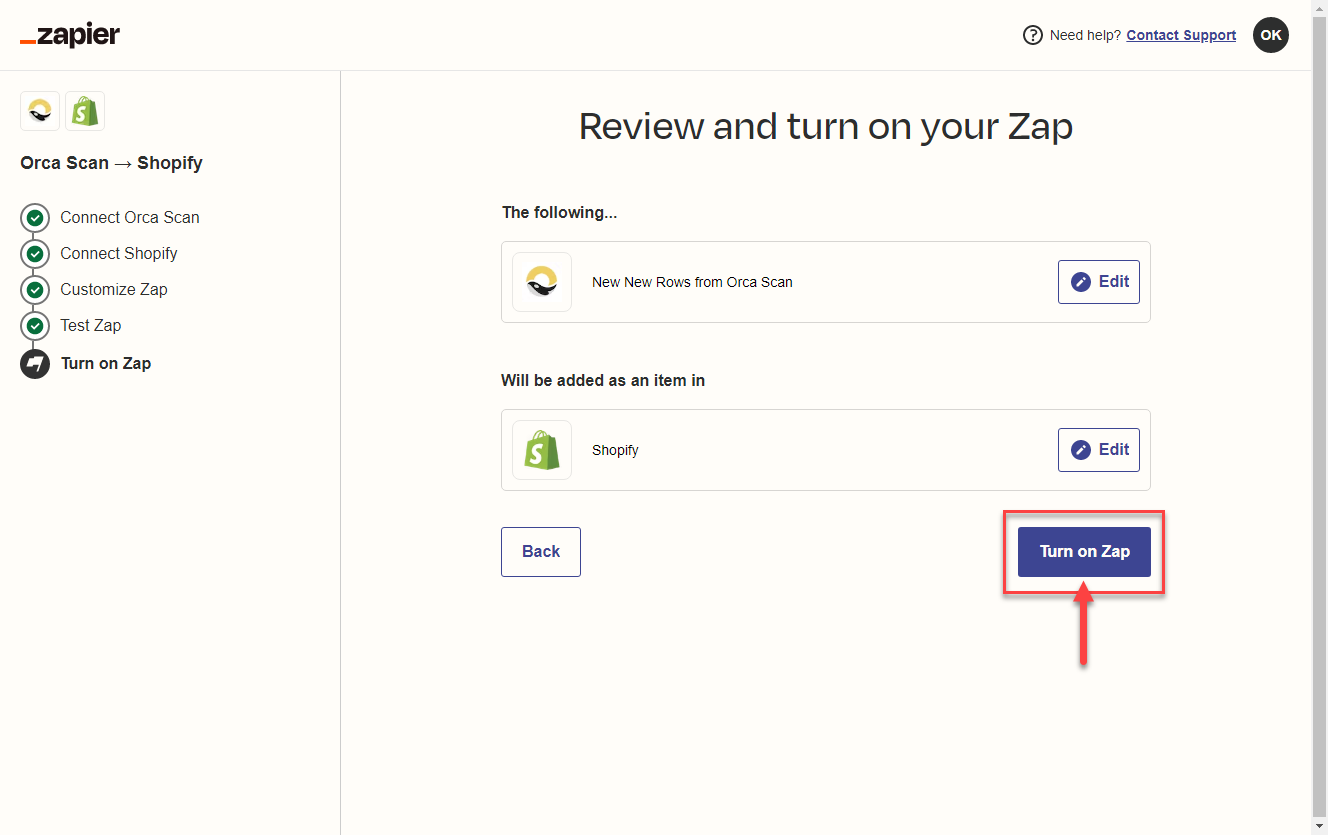
Now, when you scan an item for the first time into Orca Scan, Zapier will automatically use the data from that barcode (that you’ve added) to create a new product listing in your Shopify store
Pro tip: On a Zapier paid plan, you have the functionality to build Multi-step zaps. This means that you can build a chain of multiple actions through several apps and even introduce complex conditions and branching logic.
Update Inventory When New Orders Are Created
To ensure your inventory levels are up-to-date without requiring a daily stocktake, you can set up a trigger to capture every order in your Orca Sheet and automatically adjust quantities
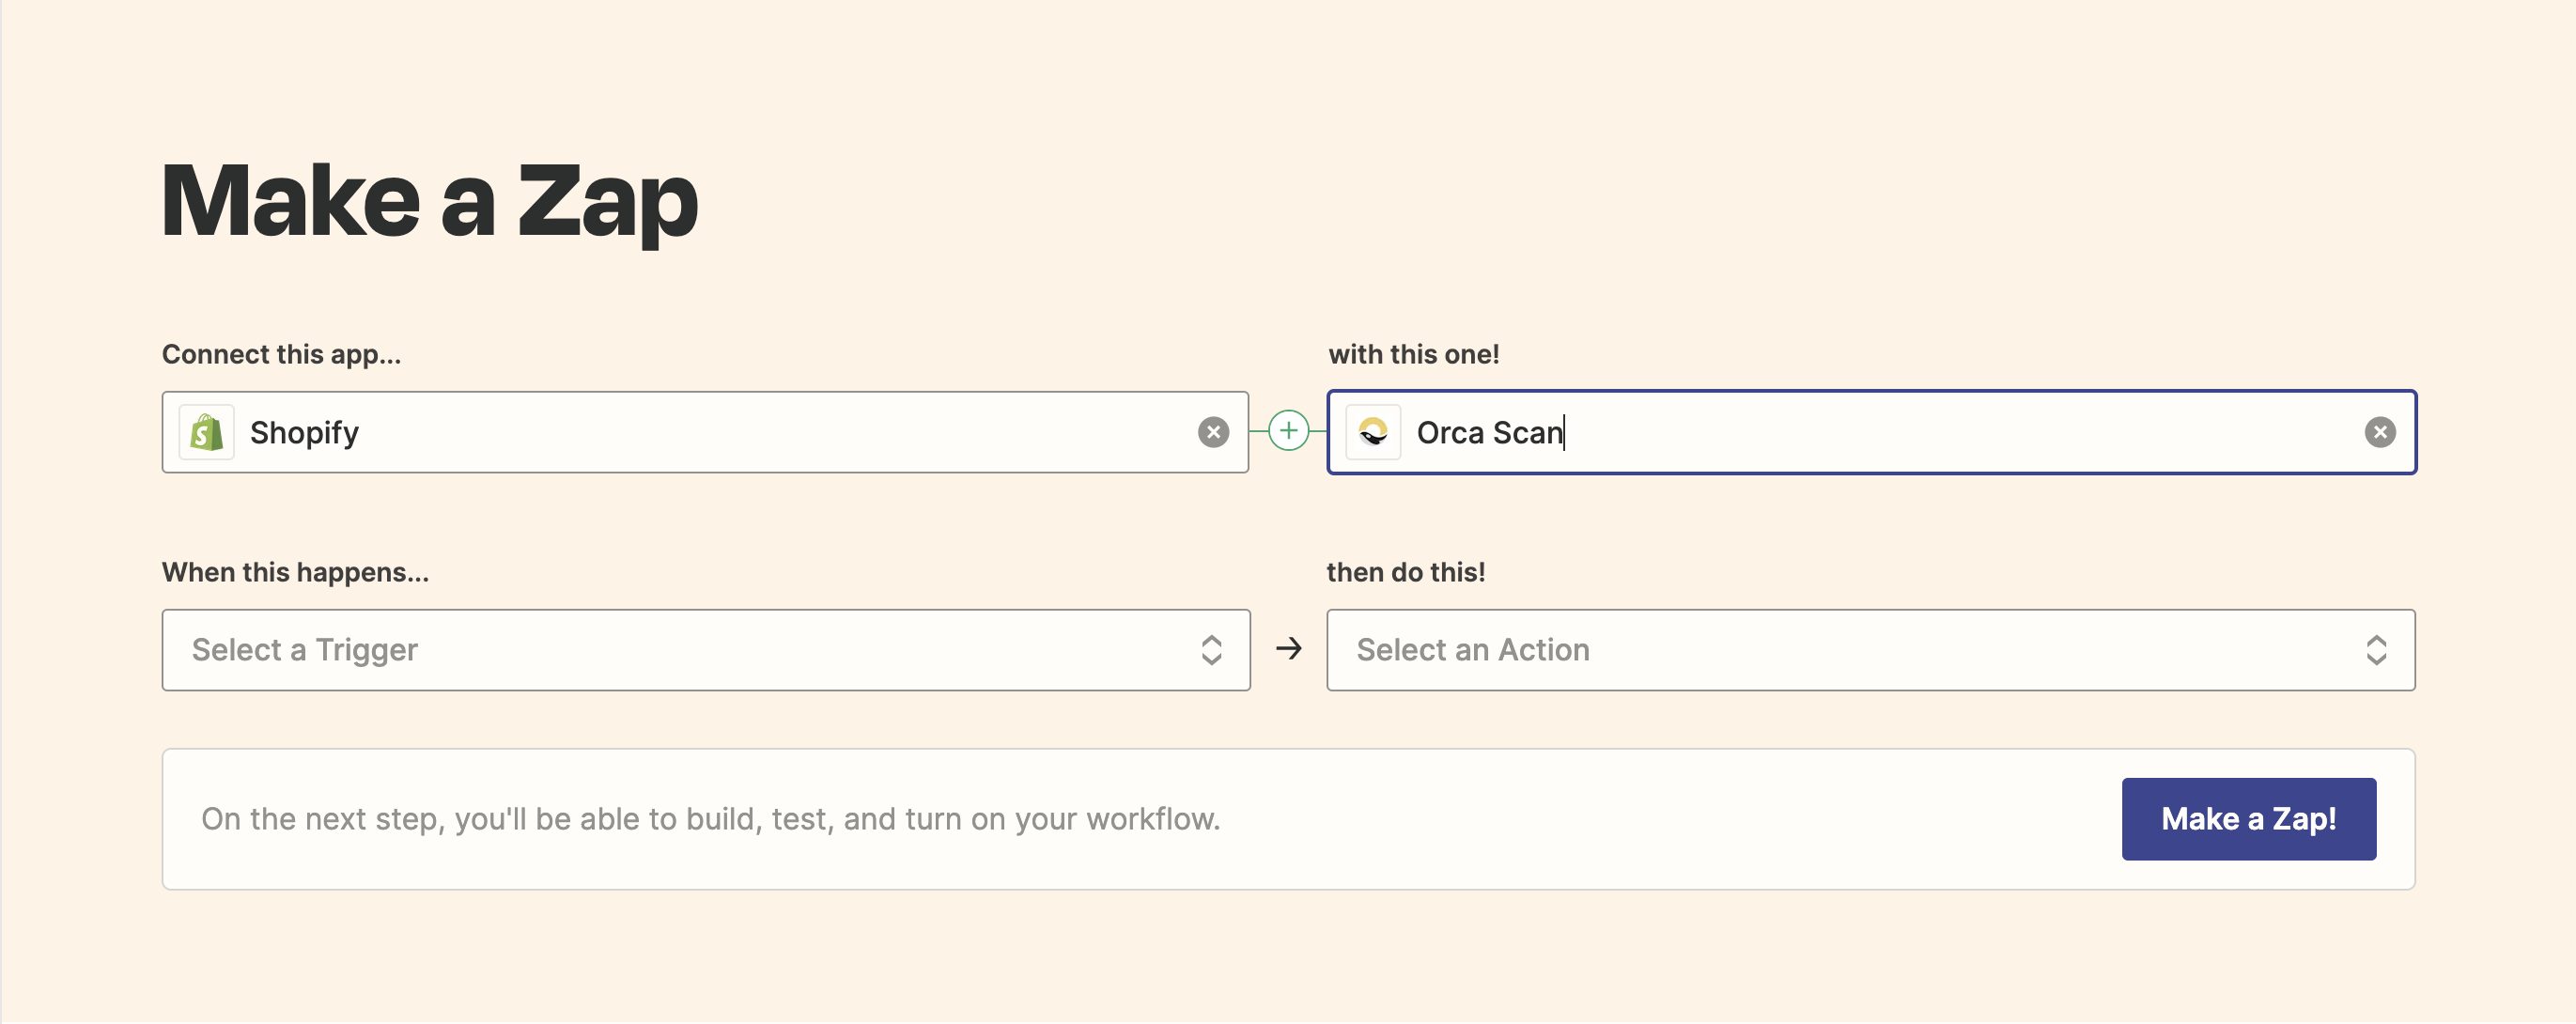
- Log in to Zapier
- Hit Create Zap
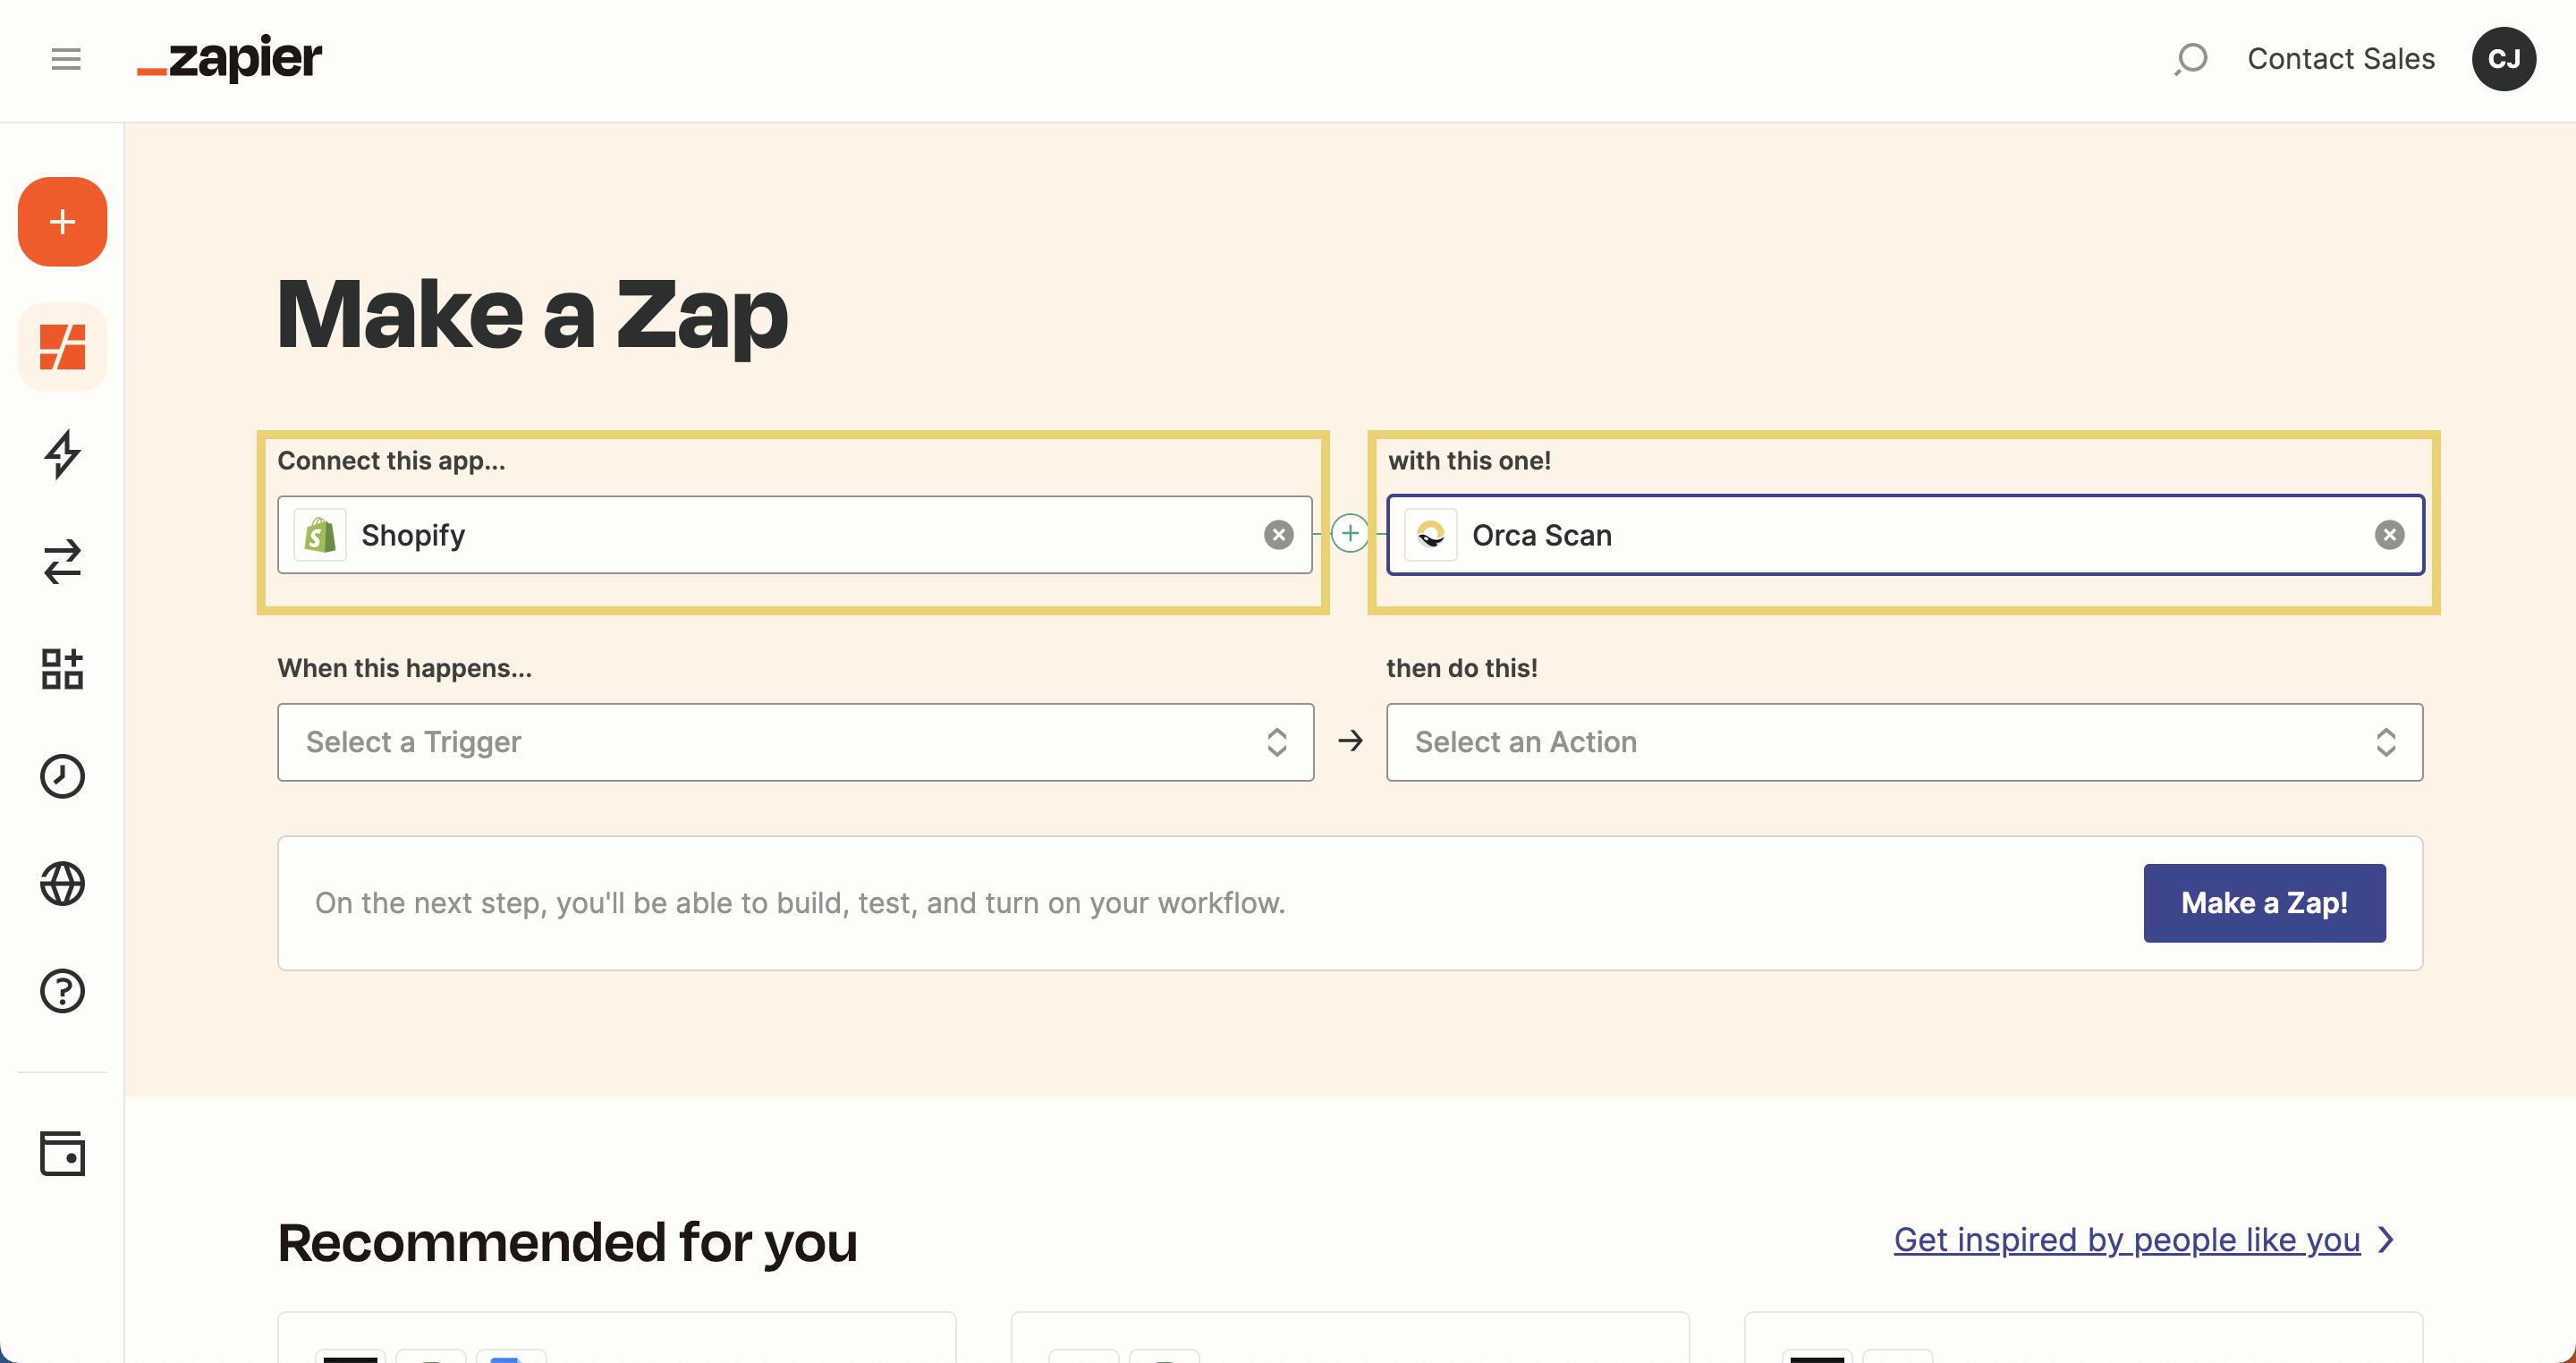
- Type Shopify into the Connect this app… field
- Add Orca Scan into the with this one! field.
Choose which events Shopify must respond to, and which actions should be executed in Orca Scan when those events occur.
Just follow these easy steps 👇
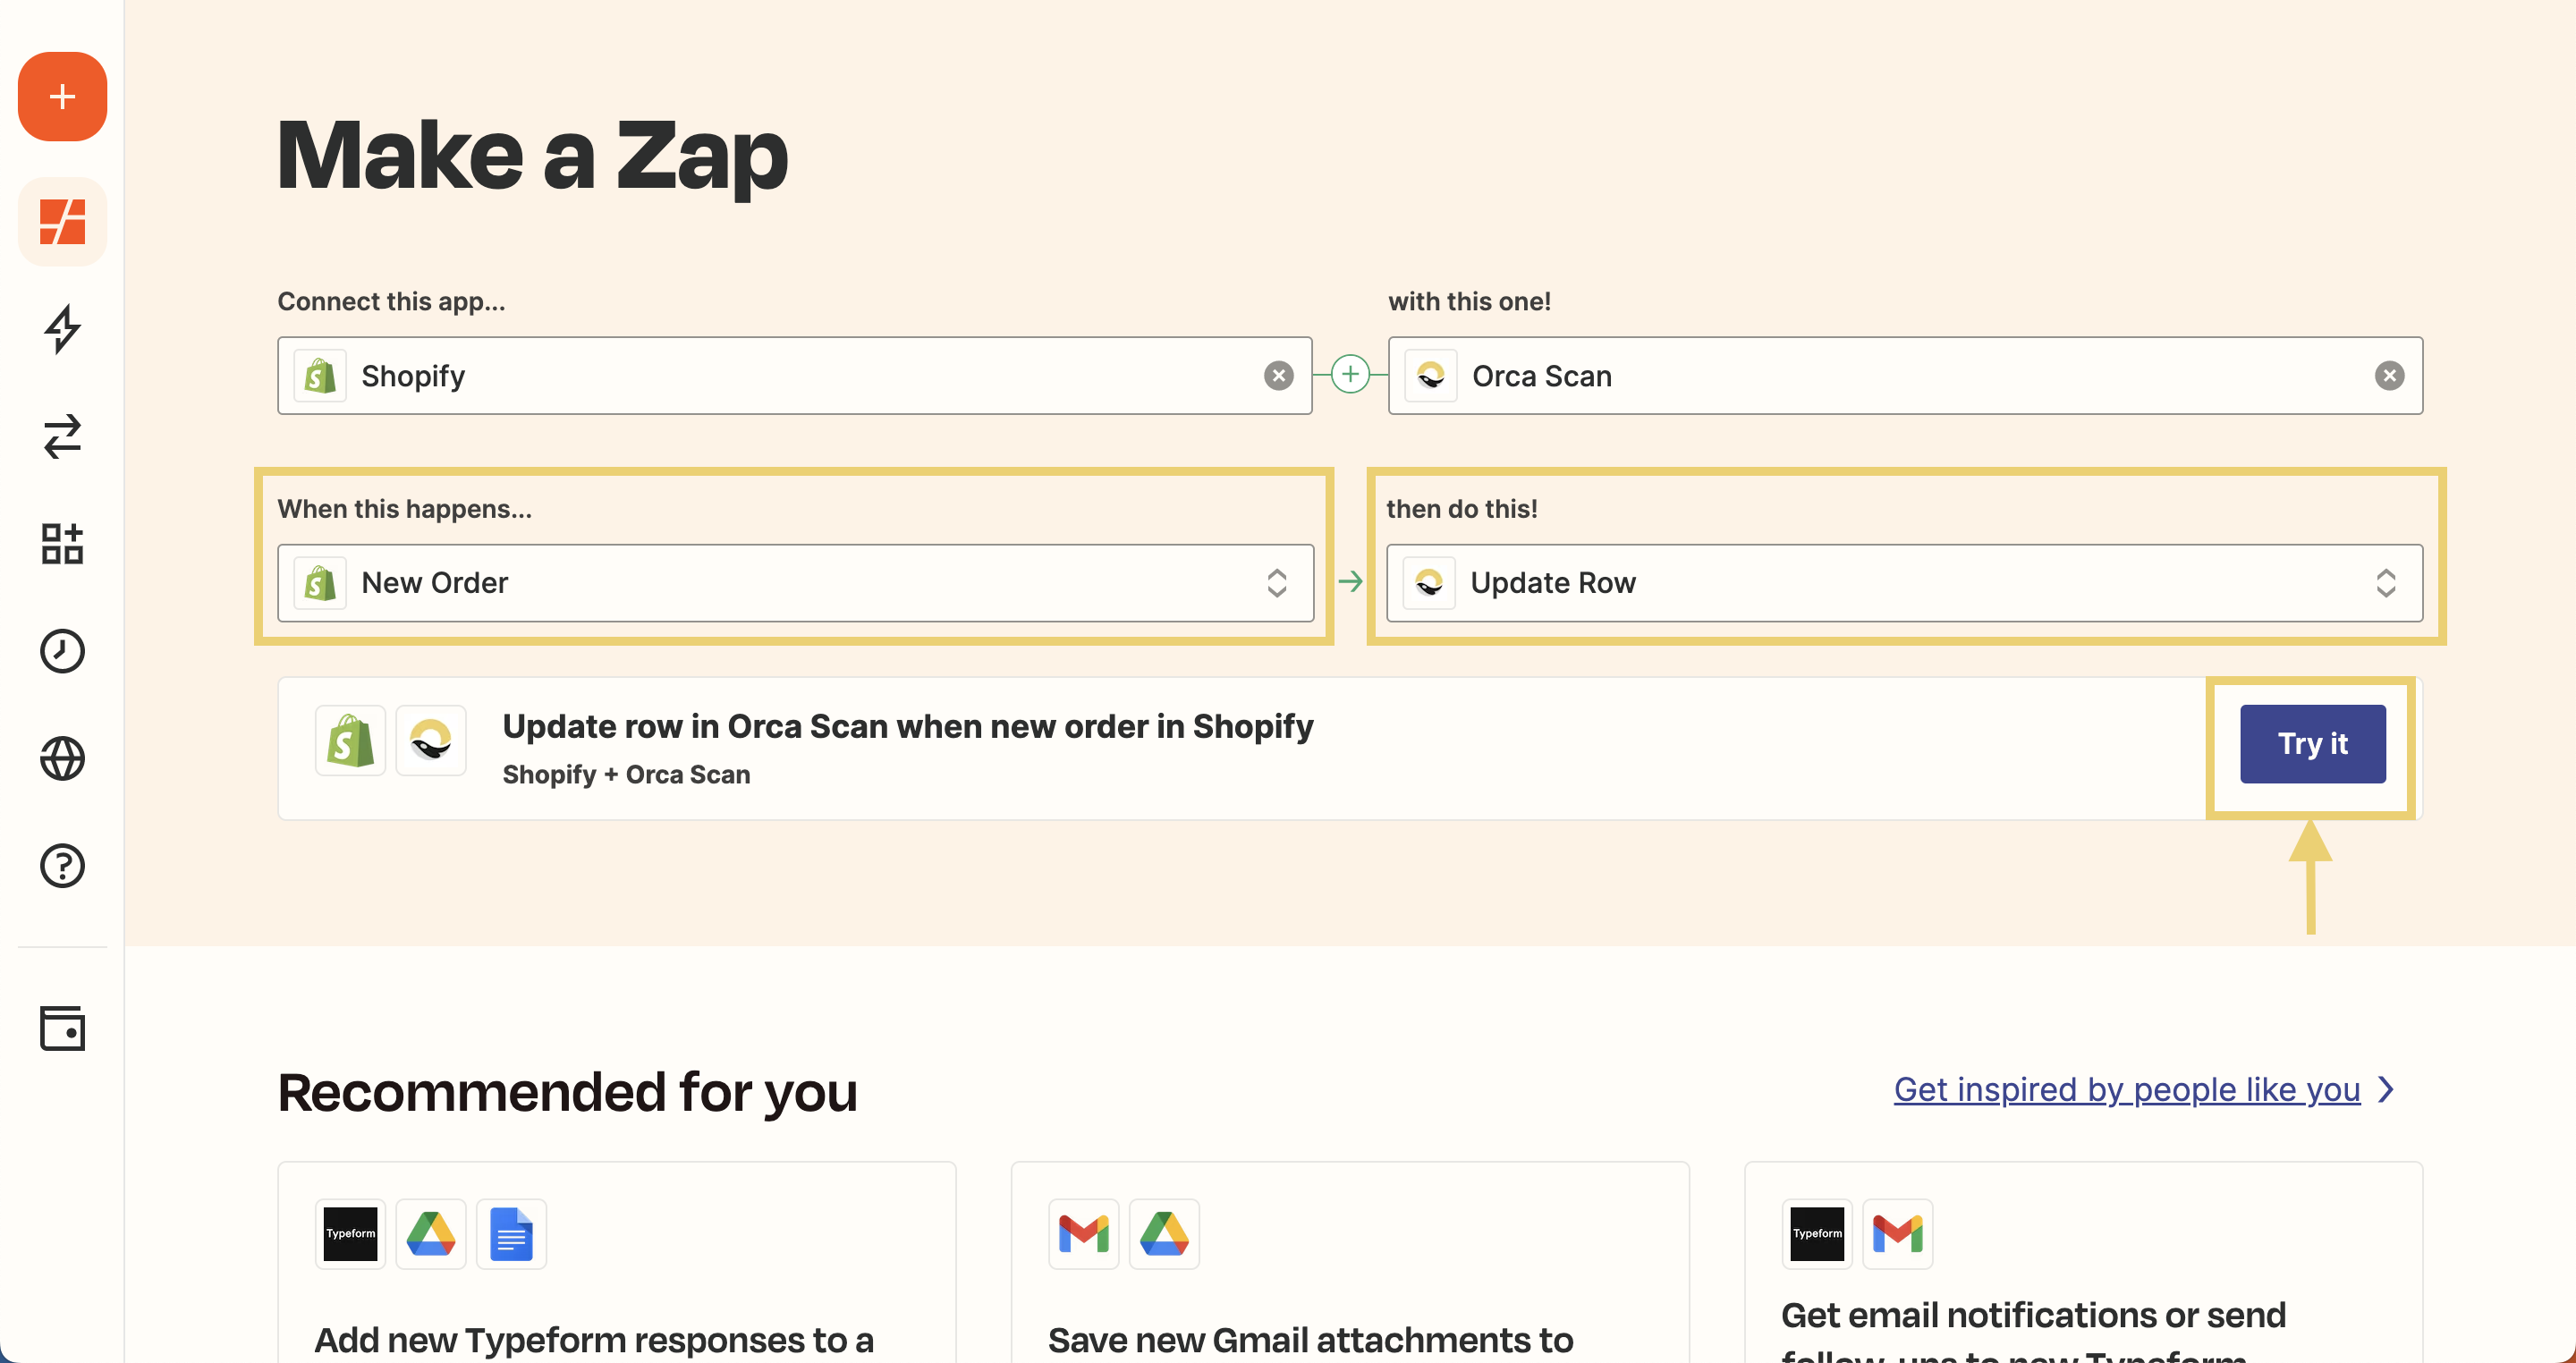
- In the When this happens… field, select New Order
- Then, in the then do this! field, select Update Row
- Then click Try it
This means that when a customer makes a purchase, Zapier will find the product(s) in that order, match them in Orca Scan, and update the quantities in real-time
Finally, on the next screen, click “Get started”
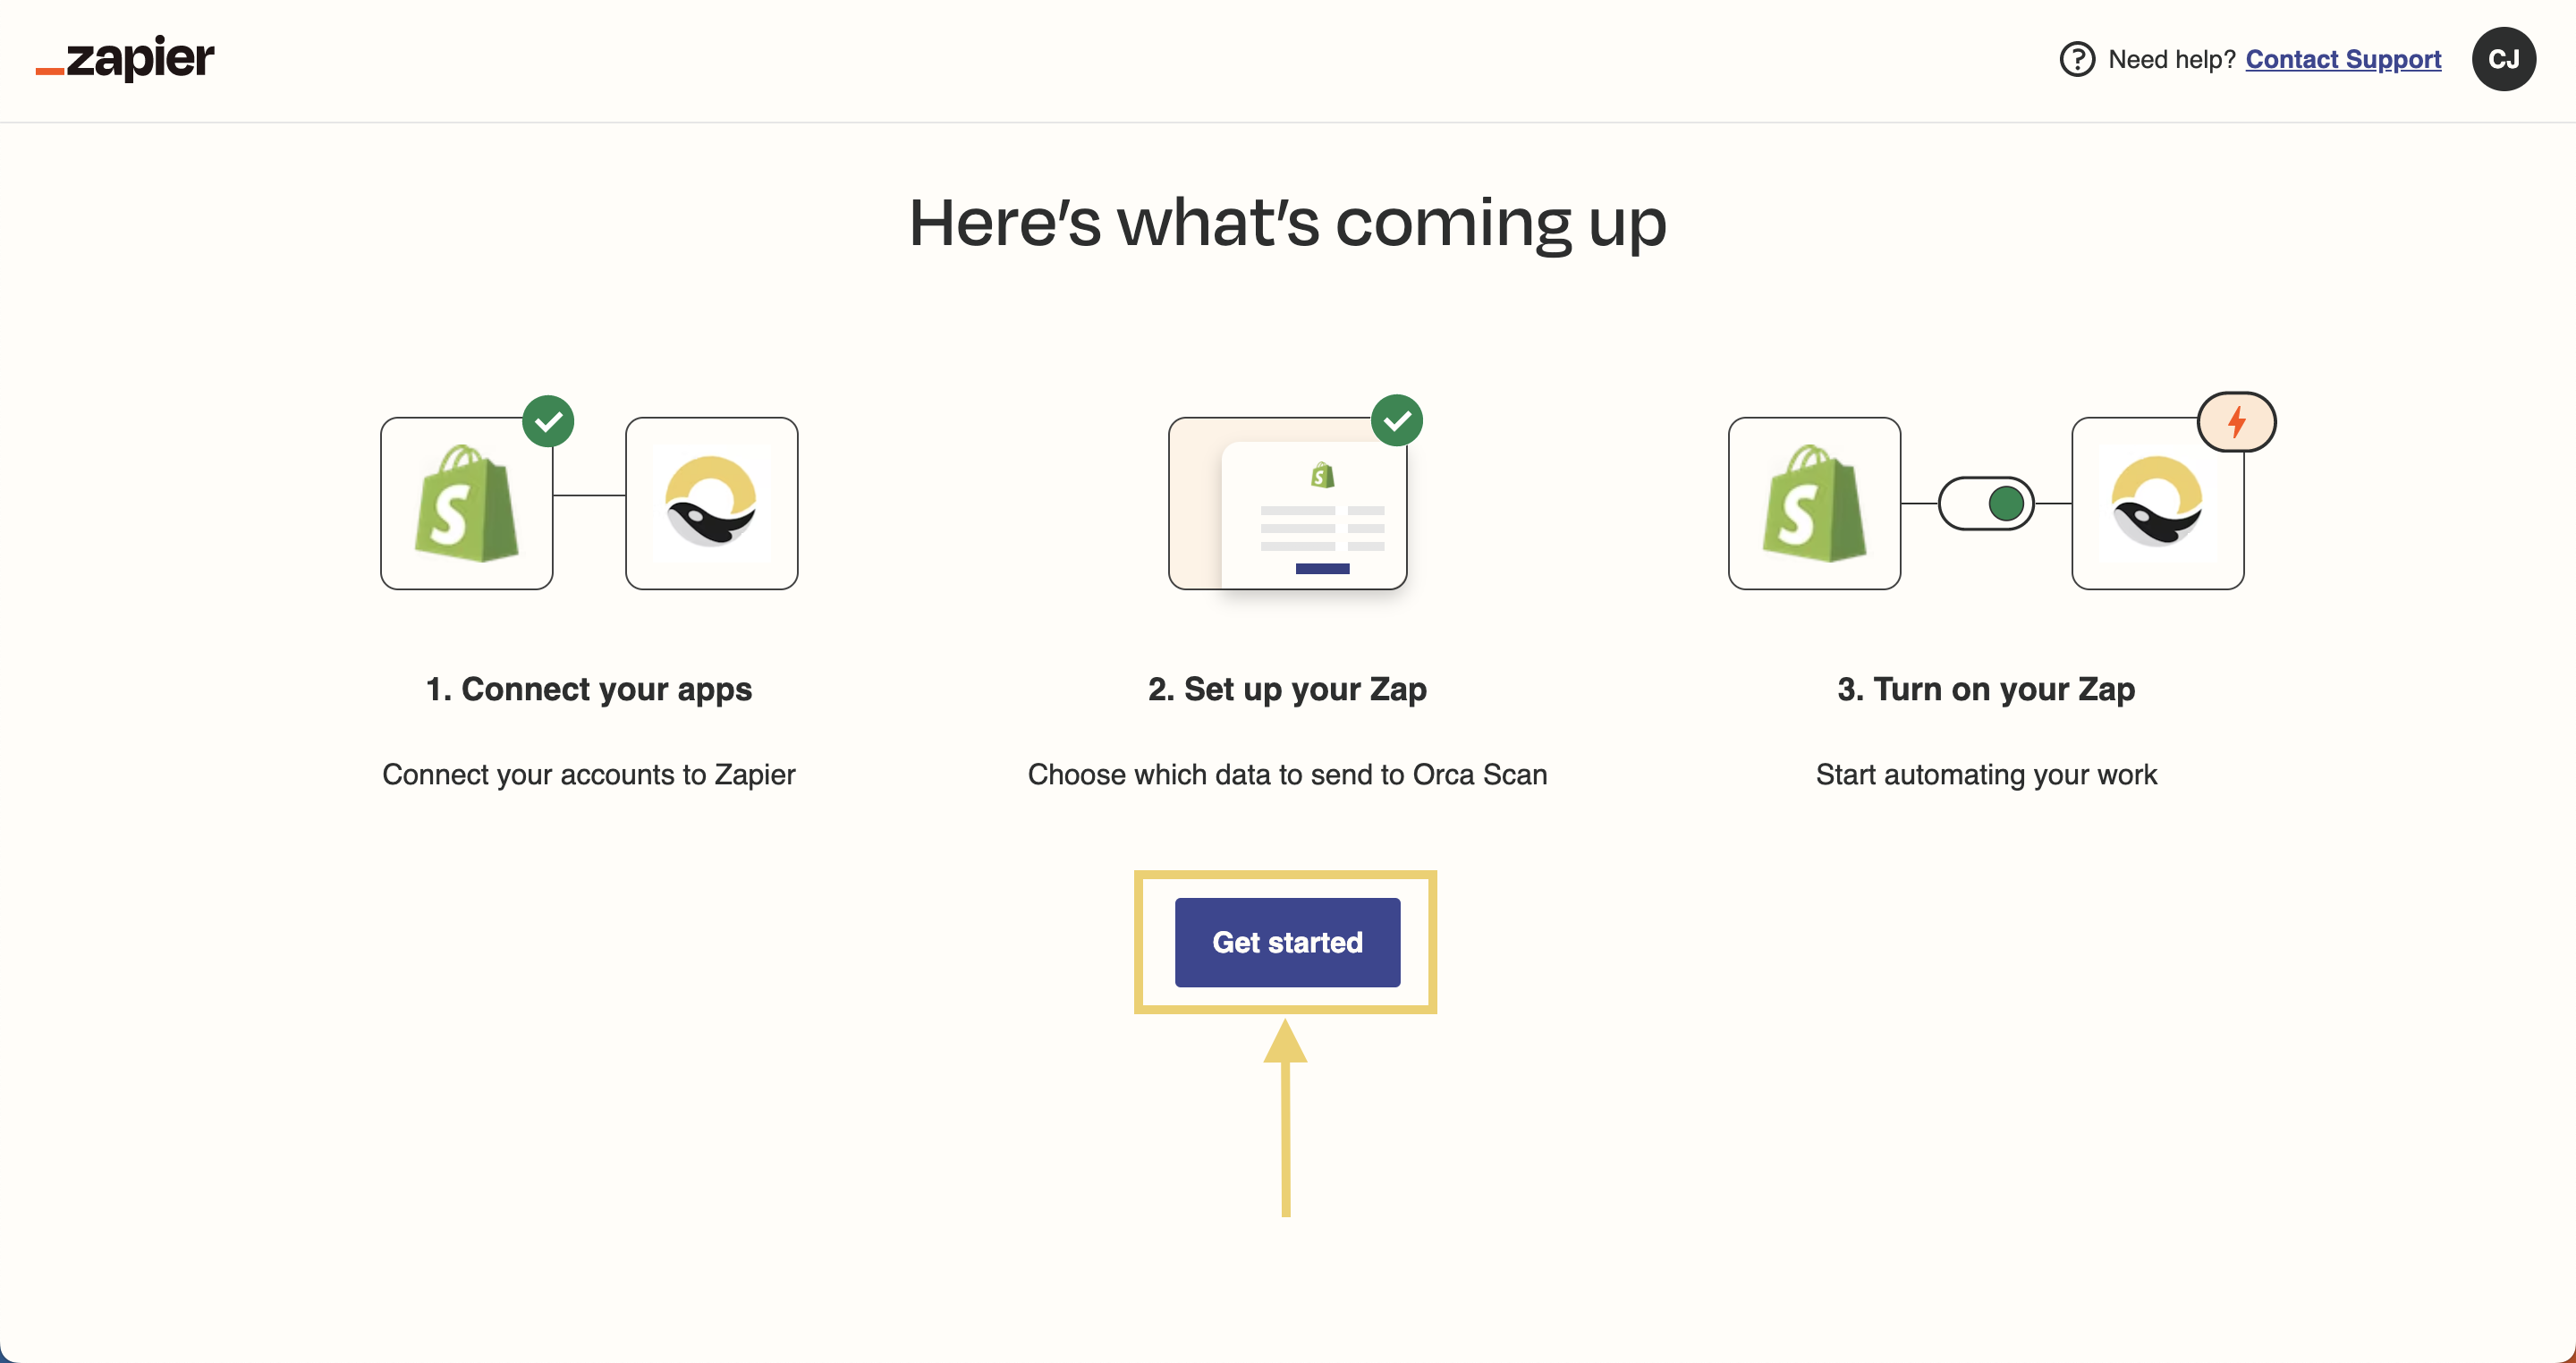
And that’s it! Your Shopify orders will now automatically adjust the quantity shown in your Orca Sheet, so your inventory is up-to-date.
Want to build more?
Using Orca Scan events to trigger Shopify actions
The following Triggers (when this happens) are available in Orca Scan:
- New row
- New sheet
The following Actions (then do this) are available in Shopify:
- Create Product
- Update Product
- Find Product by Title
- Find or Create a Product
- Create Product Variant
- Update Product Variant
- Find or Create a Product Variant
- Find Product Variant by Title
- Create Customer
- Find or Create a Customer
- Update Customer
- Find Customer
- Create Order
- Create a Blog Entry
- Update Inventory Quantity
Using Shopify events to trigger Orca Scan actions
Alternatively, you can use the following Shopify events as a trigger (when this happens):
- New Product
- New Order
- New Order (Any Status)
- New Paid Order
- Updated Order
- New Cancelled Order
- New Customer
- Updated Customer
- New Abandoned Cart
- New Blog Entry
And the triggered Actions (then do this) in Orca Scan are:
- Add/Update Row
- Update Row
- Delete Row
- Find Row
Have a question about using Orca Scan to update Shopify?
We’re always happy to help; chat with us live or drop us an email.
Request an integration
Need help getting Orca Scan working with your software? Request a Software Integration