Orca Scan makes it easy to visualise the location of all your assets and inventory in real-time, including an audit trail of an item’s entire journey.
Add a GPS location to your Orca Sheet
- To get started, you’ll need to add a GPS location column to your sheet. Right-click any column and select Add column. Add a column to the sheet from the web app
- Next, decide how you want to capture GPS Data
- Manual: The user taps the pin icon to capture their location
- Automatic: GPS is captured automatically with every scan Once you’ve decided, name the column and click save.
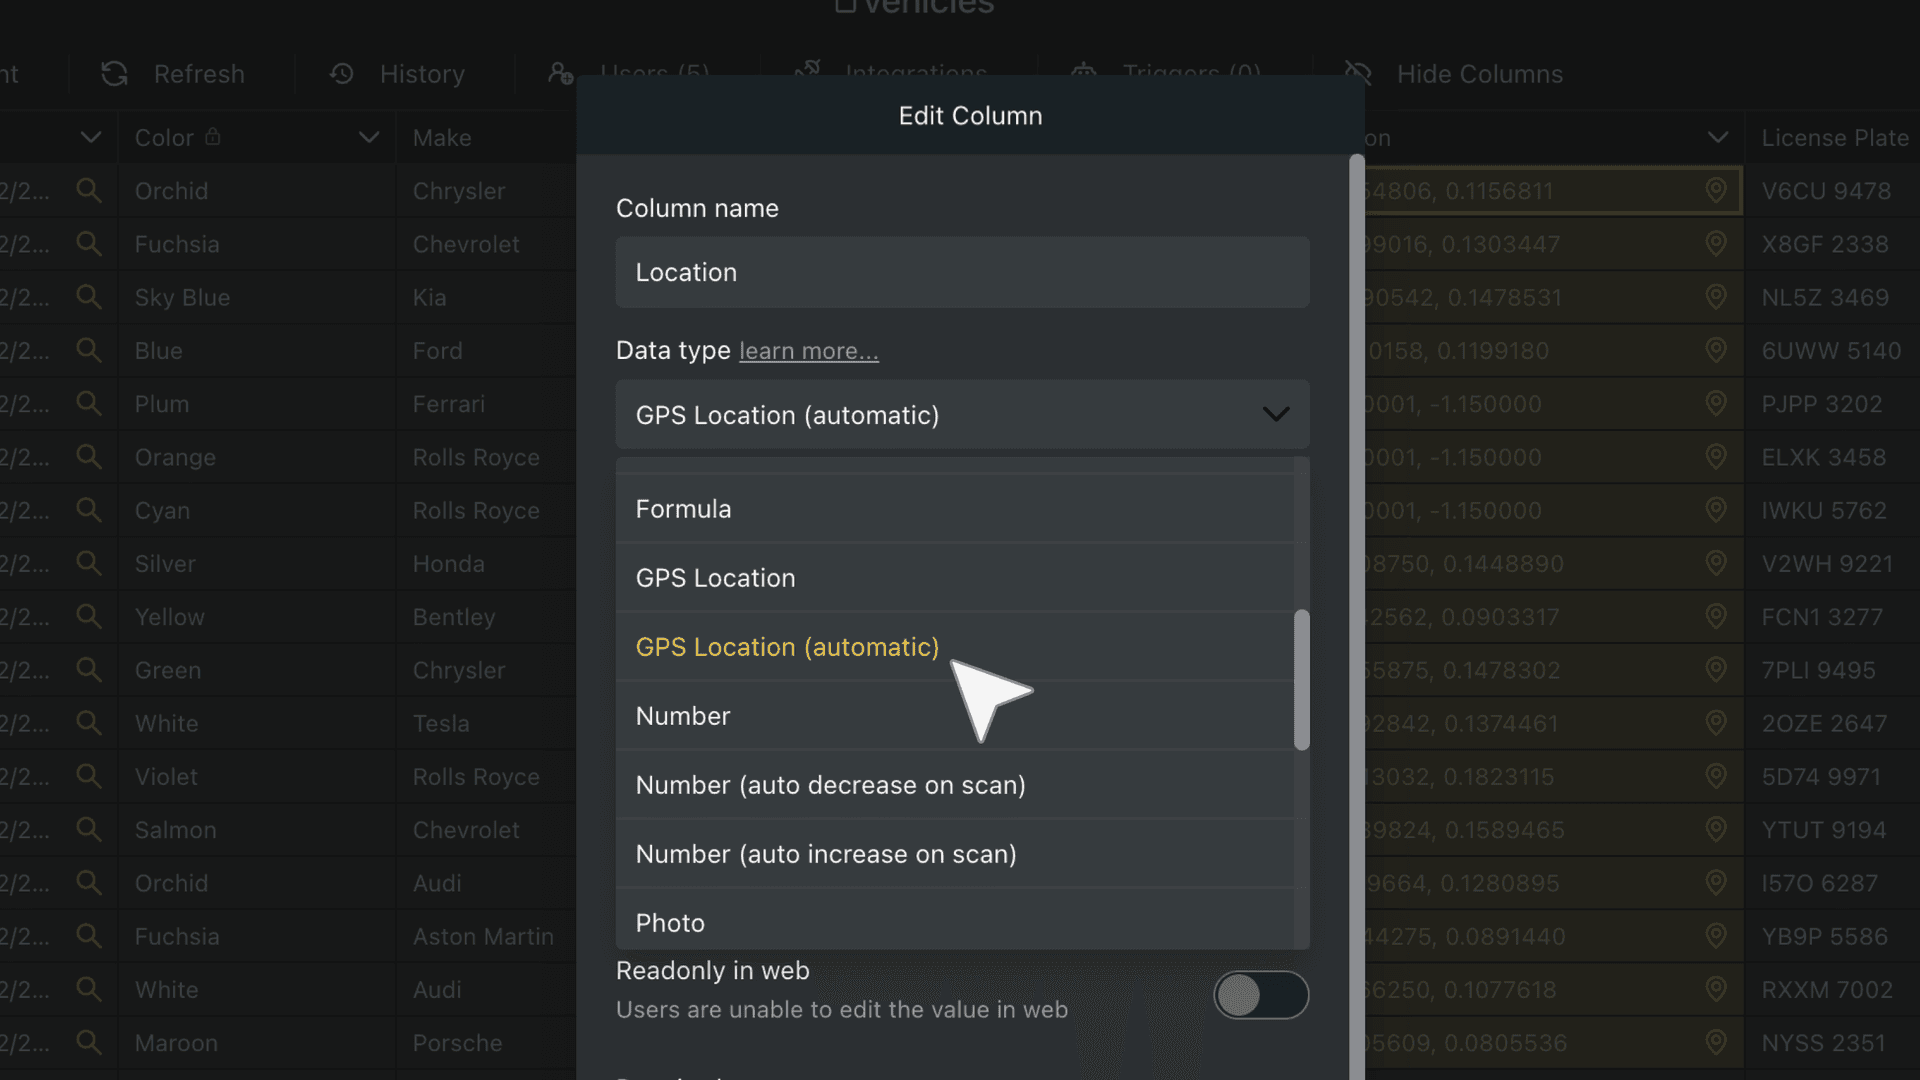
- Once you’ve added a GPS Location column, the location (latitude and longitude) is captured automatically with each scan or manually when you tap the pin icon using the manual option. Try it out by scanning an item nearby!
- After you’ve captured some location data, click the Map button at the bottom left of your sheet to see where everything is:
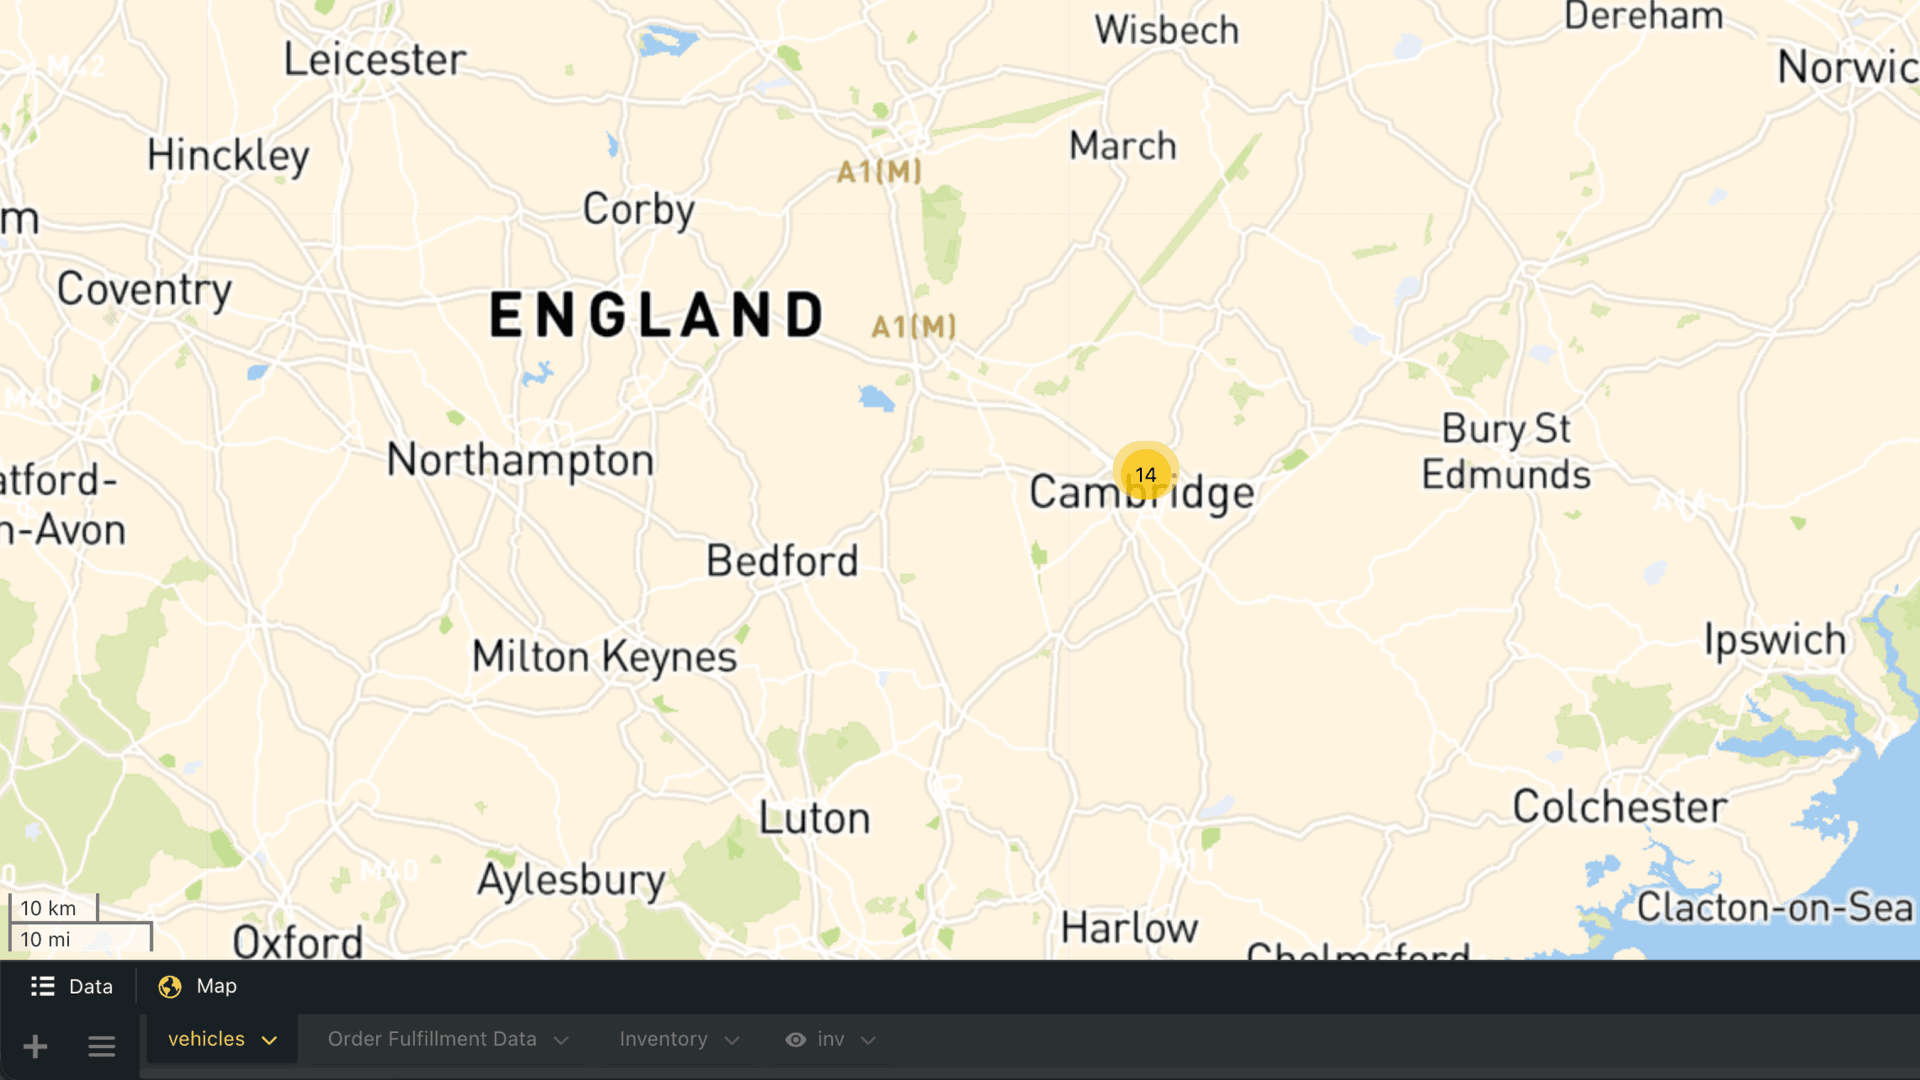
If multiple items are in the same place, they’ll be grouped into one pin with a number showing how many are in that location. Click the pin to see and select each item.
View assets with satellite maps
Once your assets have GPS locations, you can switch to satellite view to see them in a real-world context, with buildings, terrain, and site layouts visible around them.
This makes it easier to understand exactly where items are located, especially across large facilities, outdoor sites, or multiple locations.
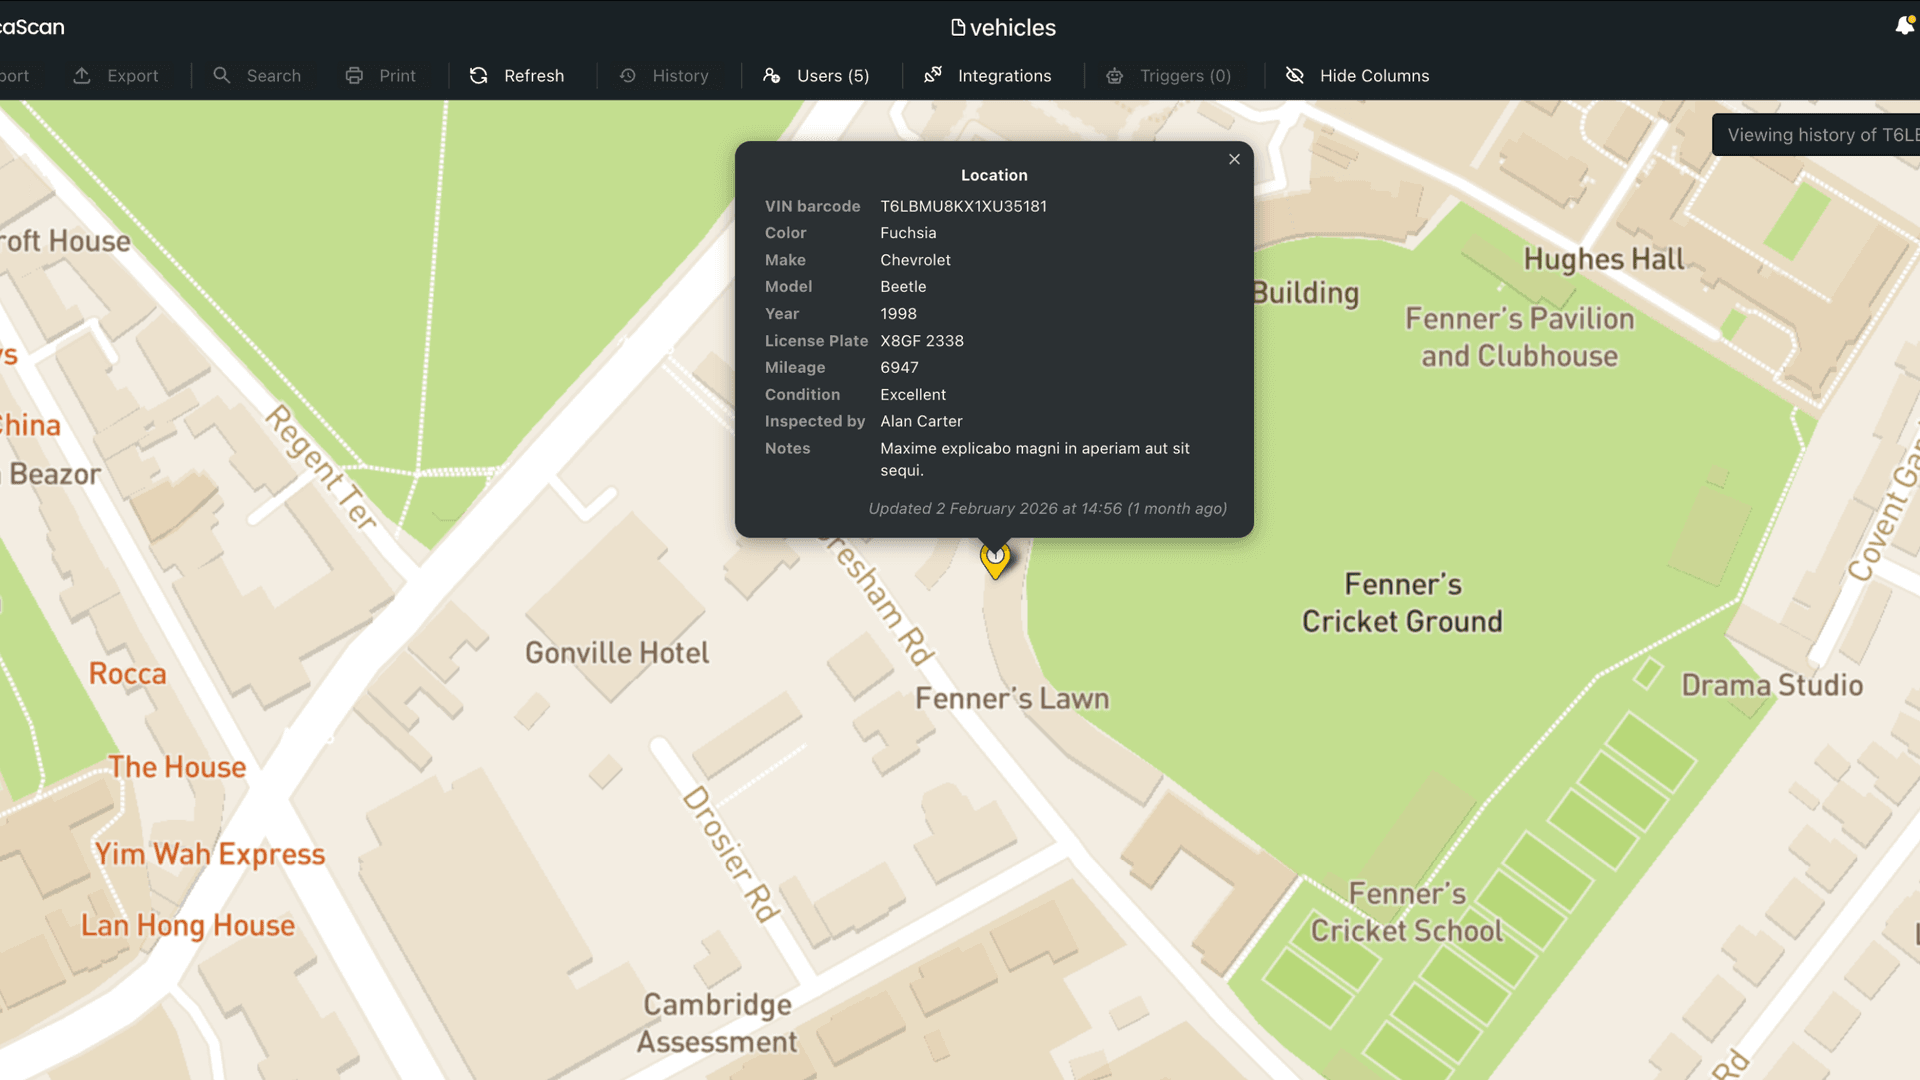
Viewing Location History
Each time an asset or inventory item is updated, its location will be captured, and the historical data can be viewed on the map. The same concept applies to viewing the different component fabrication locations.
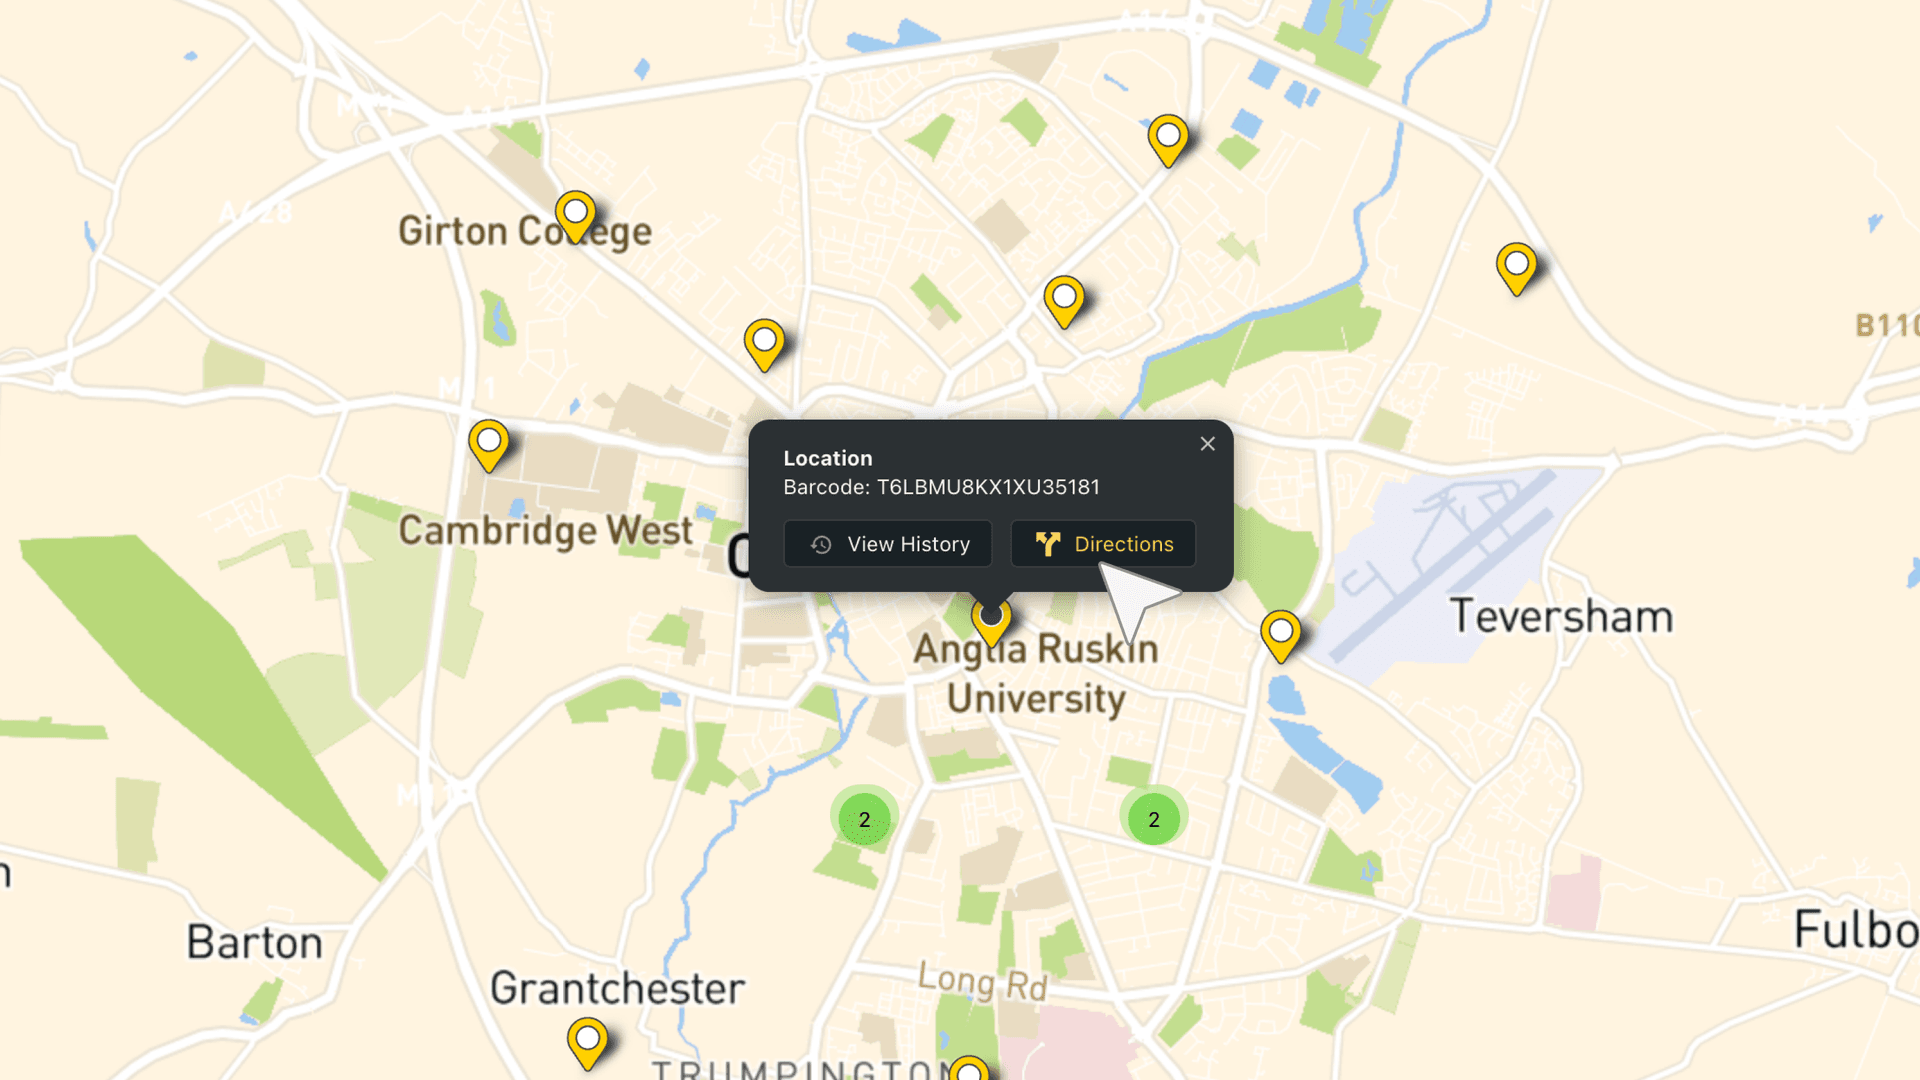
To view an item’s location history, click a map pin:
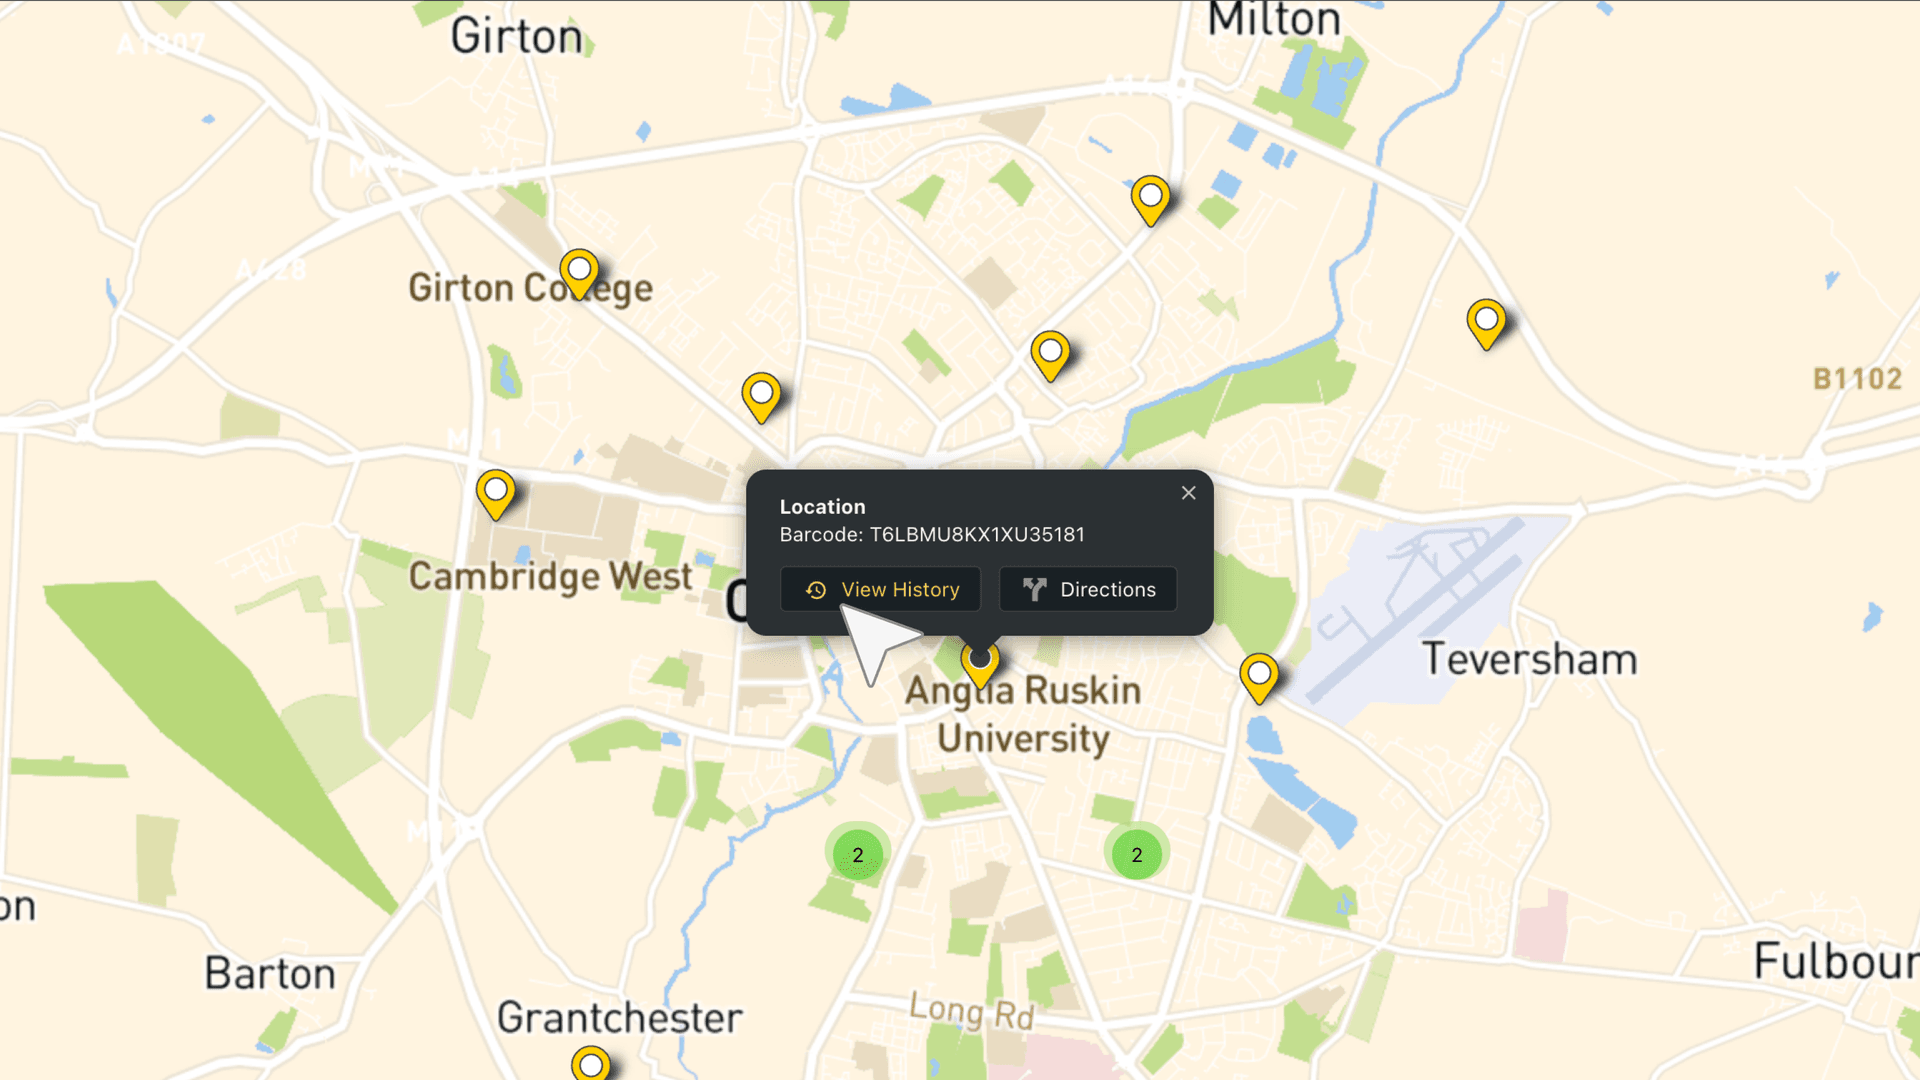
and then view the history 👇
Getting Directions to an Asset
If you need to visit an asset, you can get directions to its last known location from the map
Questions about asset maps?
We’re always happy to help, chat with us live or drop us an email.